
Why Model Y handles fail
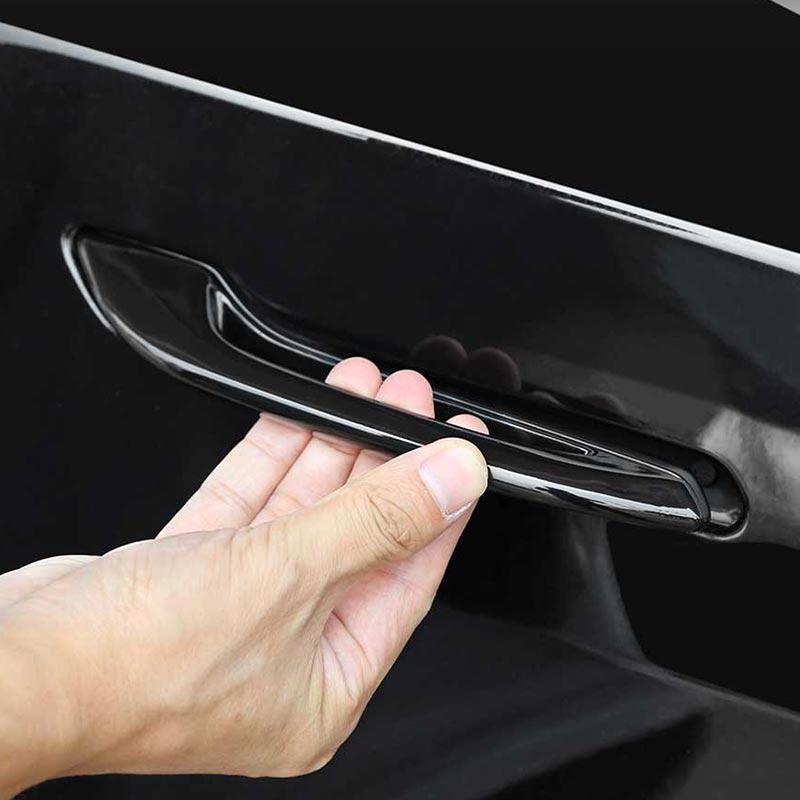
There’s a particular sinking feeling you get when your Tesla Model Y’s door handle refuses to cooperate. It’s not just inconvenient; it’s unsettling, especially considering the vehicle’s price point. I’ve been hearing more and more stories from owners online – on forums and even in local Tesla groups – about these handles failing, sometimes within the first year of ownership. It’s a frustrating experience, to say the least.
The Model Y’s door handles aren't like traditional, purely mechanical ones. They rely on a complex electronic latch mechanism that extends and retracts the handle. This design aims for a sleek, aerodynamic look, but it introduces potential points of failure. The biggest culprit seems to be cold weather, which can affect the moving parts and electrical connections within the handle assembly.
Professional repairs can be expensive, easily running $500 to $1500 depending on the dealership and the extent of the damage. That’s a significant sum, and it’s led many owners to consider a DIY approach. While it’s not a repair for everyone, a careful, methodical owner with some basic automotive knowledge might be able to tackle this issue themselves. It's a gamble, but one that could save a lot of money.
The main culprits: motors and moisture
The Model Y door handle issues typically stem from a few key areas. The actuator motor, which physically moves the handle, is a frequent point of failure. These motors can wear out over time, especially with frequent use and exposure to the elements. Another common problem lies within the wiring harness, specifically corrosion or breaks in the wires leading to the handle.
Water ingress is a huge factor. Rain, snow, and even washing the car can allow moisture to seep into the handle assembly, leading to corrosion on the electrical contacts. Cold temperatures then exacerbate this issue, causing the corroded connections to become even more unreliable. The physical latch mechanism itself can also become sticky or jammed, preventing the handle from operating smoothly.
These failures don't mean the car is a lemon. It's just what happens when you put complex electronics in a door that gets rained on and frozen. Mechanical handles are simpler, but these motorized versions need more attention to keep the moisture out.
Tools you'll actually use
Before you start, gather the necessary tools. You'll definitely need a set of Torx screwdrivers – T20, T30, and potentially T40 sizes are common in Tesla interiors. Plastic trim removal tools are essential to avoid scratching or damaging the interior panels; metal tools are a big no-no. A multimeter is crucial for testing voltage and continuity, and electrical contact cleaner will be needed to clean any corroded connections.
Dielectric grease is also important for protecting connections from future corrosion. A heat gun can be helpful for softening stubborn trim pieces, but use it cautiously to avoid melting the plastic. Depending on the diagnosis, you might need a replacement actuator, which can be sourced from Tesla’s parts department or aftermarket suppliers.
Wear gloves and safety glasses. You don't strictly need a diagnostic tool to read codes for this, as a multimeter and a close look at the wires usually tell the whole story.
- Torx Screwdriver Set (T20, T30, T40)
- Plastic Trim Removal Tools
- Multimeter
- Electrical Contact Cleaner
- Dielectric Grease
- Heat Gun (optional)
- Replacement Actuator (if needed)
- Gloves
- Safety Glasses
Tools & Materials Checklist
- Tesla Model Y Door Handle Repair Kit - Specifically designed for Model Y handles, including replacement parts like springs and actuators.
- T8 Torx Screwdriver - Used to remove interior door panel screws and access the door handle mechanism.
- Plastic Pry Tools - For safely removing the door panel without causing damage to the interior.
- Small Flathead Screwdriver - Useful for disconnecting electrical connectors and manipulating small parts.
- Silicone Grease - To lubricate moving parts of the door handle mechanism, ensuring smooth operation.
- Clean Microfiber Cloths - For cleaning surfaces and preventing fingerprints.
- Gloves (Nitrile or Latex) - To protect your hands and prevent contamination of the door handle components.
- Inspection Mirror & Flashlight - To help visualize the internal door mechanism in tight spaces.
Step-by-Step: Door Panel Removal
Removing the Model Y door panel is the first step. Start by locating all the screws hidden beneath the trim pieces. Use your plastic trim removal tools to gently pry off the triangular trim piece near the side mirror – there’s usually a screw hidden underneath. Next, remove the screw hidden behind the door handle mechanism and the one inside the armrest pocket.
Once the screws are out, begin carefully prying around the edges of the door panel with your trim tools. Work slowly and methodically, listening for the "pops" as the clips release. Start at the bottom and work your way around the sides and top. Be especially careful near the power window and door lock switches.
Once all the clips are released, lift the door panel upwards to disengage it from the window sill. Be mindful of the electrical connectors attached to the panel – the window switch, door lock actuator, and speaker wiring. Disconnect these connectors carefully by pressing the release tabs. Don't force anything. Document where each connector goes, maybe with a quick photo, to make reassembly easier.
- Pop off the mirror trim to find the first screw
- Remove screw from door handle mechanism.
- Remove screw from armrest pocket.
- Pry off door panel edges with plastic trim tools.
- Lift the door panel upwards.
- Disconnect electrical connectors.
Testing the actuator and wiring
With the door panel removed, you can start diagnosing the issue. Begin by inspecting the wiring harness for any visible damage, such as frayed wires or corroded connectors. Pay close attention to the wiring near the door hinge, as this area is prone to bending and stress. If you see corrosion, clean the connectors with electrical contact cleaner.
Next, test the actuator motor. Disconnect the electrical connector from the actuator. Set your multimeter to the continuity setting and test the actuator’s terminals. You should get a reading. Then, with the connector reattached (carefully!), check for voltage at the actuator when you attempt to operate the door handle from the inside. A reading around 12V is typical, but I’m not sure about the exact specification for the Model Y.
If the wiring and actuator seem okay, manually test the latch mechanism. Try to actuate the latch with your hand. It should move smoothly. If it feels sticky or jammed, it may need lubrication or replacement. Sometimes, a simple application of silicone spray lubricant can resolve the issue. If the latch feels fine, the actuator is the most likely culprit.
Repairing Wiring & Connections
If you find damaged wiring, proper repair is essential. Cut out the damaged section of wire and strip the ends of the good wires. Use butt connectors or solder to join the wires together, ensuring a secure connection. Always use heat shrink tubing over the connection to insulate it and protect it from corrosion. A proper crimping tool is vital for a good mechanical connection with butt connectors.
After making the repair, thoroughly clean all electrical connectors with electrical contact cleaner. This removes any dirt, grime, or corrosion that could interfere with the connection. Once clean, apply a generous amount of dielectric grease to the connectors before reassembling them. Dielectric grease helps to prevent corrosion and ensures a reliable electrical connection.
Take your time and double-check your work. A poorly repaired wire can cause intermittent problems or even a short circuit. A good repair is invisible and feels solid. Remember to carefully route the wires to prevent them from being pinched or stressed when you reinstall the door panel.
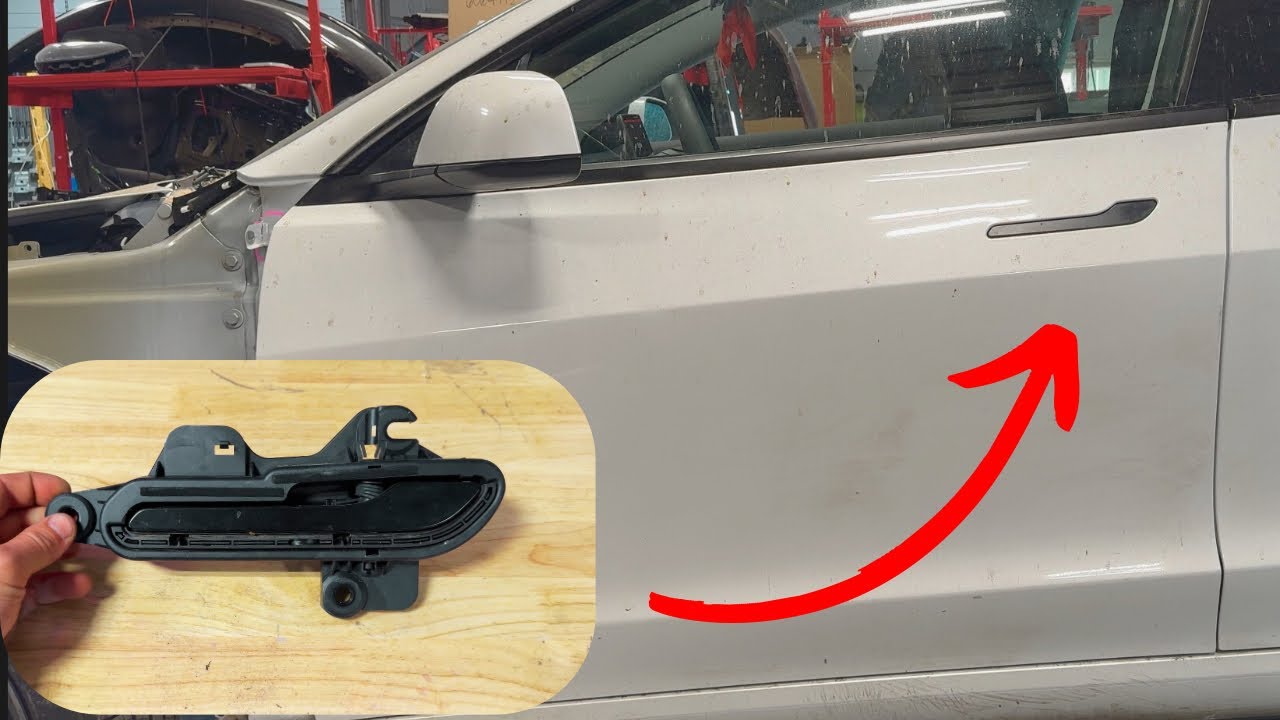
Actuator Replacement (If Necessary)
If the actuator is faulty, replacement is necessary. Disconnect the electrical connector from the old actuator. Depending on the design, there may be a retaining clip or screws holding the actuator in place. Remove these and carefully remove the old actuator. Note its orientation for proper installation of the new one.
Install the new actuator by aligning it correctly and securing it with the retaining clip or screws. Reconnect the electrical connector. Ensure the connector clicks into place, indicating a secure connection. A loose connection can cause the actuator to malfunction.
You can source replacement actuators from Tesla’s parts department, which will be the most expensive option, or from aftermarket suppliers. Be sure to purchase a high-quality actuator from a reputable source. Some aftermarket actuators have a questionable track record for reliability.


No comments yet. Be the first to share your thoughts!