
The high cost of luxury EV leather
High-end electric cars like the Tesla Model S or Porsche Taycan use premium leather to justify their price tags. If you're coming from a gas car, you'll find these seats need more attention. The repair bills are higher, and since these cars are often seen as tech investments, a trashed interior kills the resale value faster than a mechanical issue.
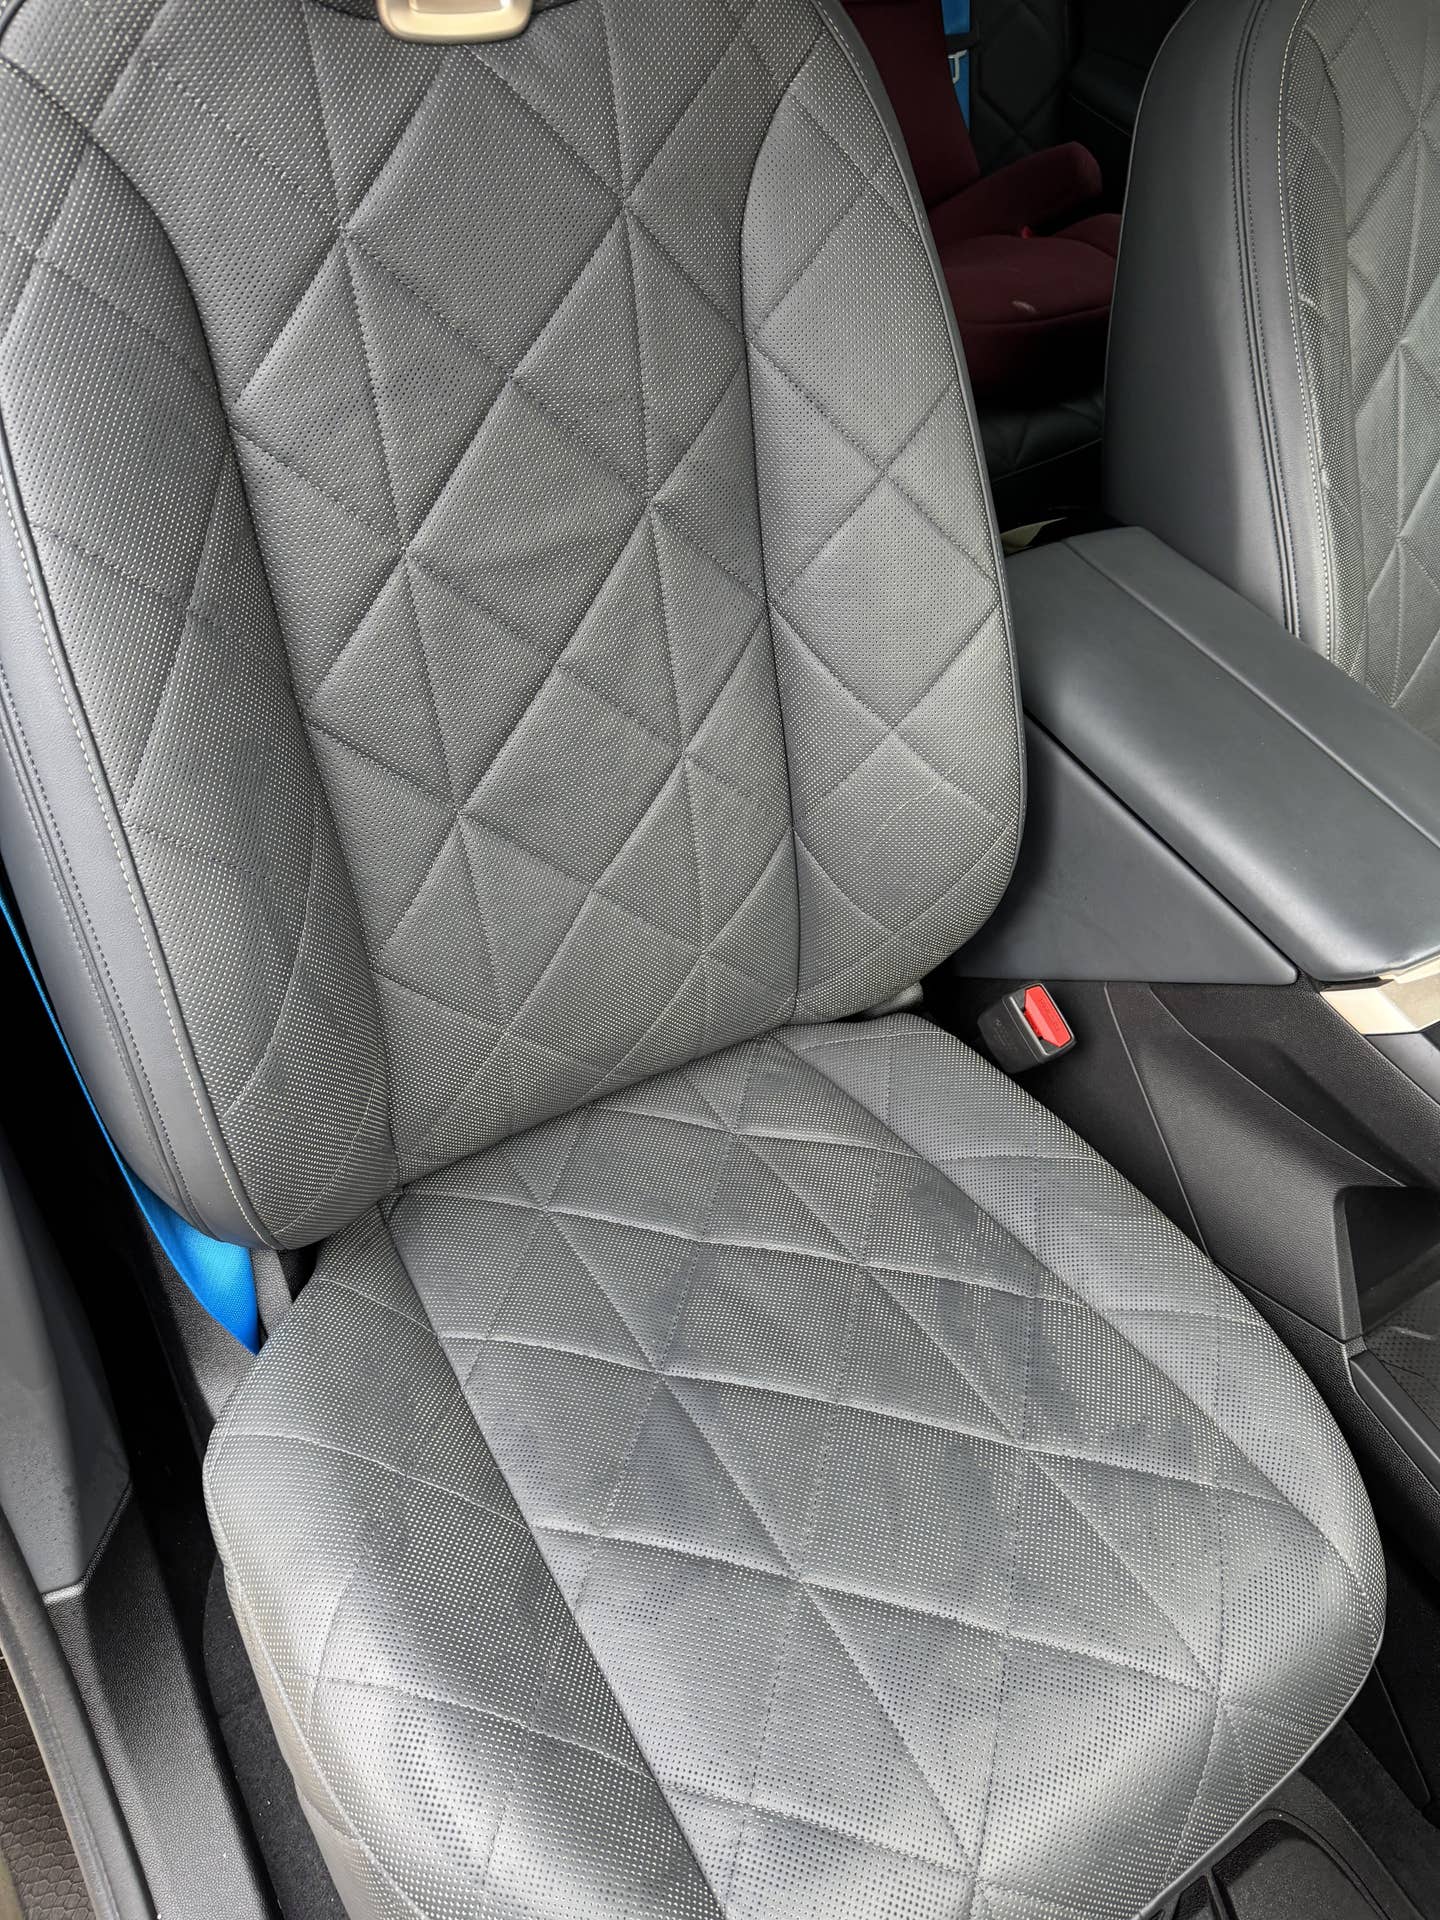
Unlike older vehicles where leather was often an option, it’s now a standard feature in many high-end EVs. This means more leather surfaces are exposed to wear and tear. The materials themselves can vary—you’ll find everything from Nappa leather, known for its softness and natural grain, to Merino leather, which is exceptionally smooth and durable—and each type has its own specific vulnerabilities. A small scratch on a standard vinyl seat is one thing, but damage to $10,000 worth of full-grain leather is another.
The specialized nature of EV components, including the leather, adds to the complexity. Many EVs utilize unique tanning and finishing processes to achieve a specific look and feel. These processes can impact how the leather ages and how it responds to repair attempts. Plus, the expectation is higher. EV owners generally demand a flawless interior, and even minor imperfections can detract from the overall experience. We at AutoBodyRX see this expectation frequently with our customers.
Why EV seats wear out fast
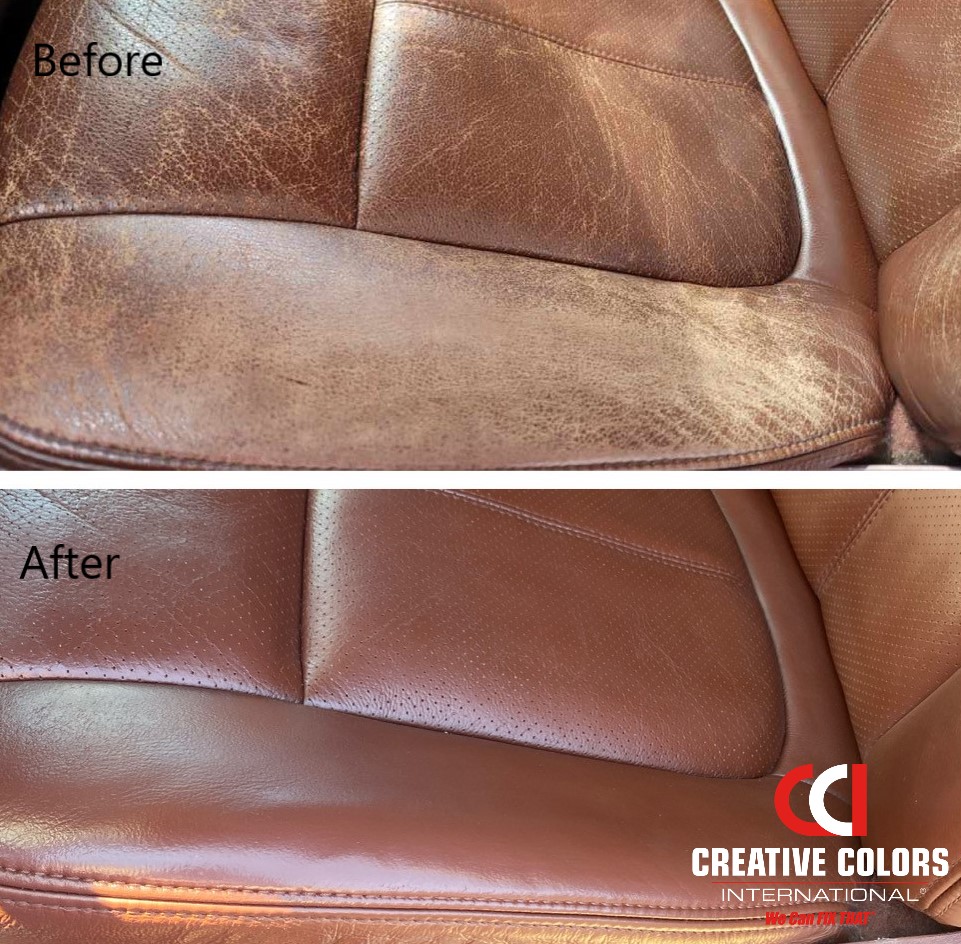
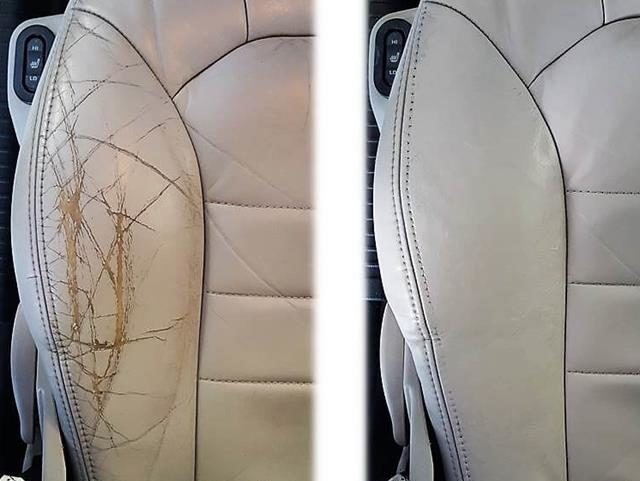
Several issues plague EV leather interiors. Cracking, often caused by prolonged exposure to sunlight and UV rays, is a frequent complaint. We’ve had customers call us after just a year or two of ownership, frustrated by the premature aging of their seats. Wear and tear from entry and exit points – the bolsters and seat bottoms – are also common, especially for drivers. These areas experience constant friction and pressure.
Dye transfer from clothing, particularly dark-wash jeans, is surprisingly prevalent. It manifests as discoloration on lighter-colored leather, and it can be difficult to remove without professional help. Spills—coffee, food, even water—can stain or damage the leather if not addressed immediately. And, perhaps counterintuitively, improper cleaning products are a major culprit. Many over-the-counter cleaners contain harsh chemicals that strip the leather of its natural oils, leading to drying and cracking.
I've seen owners try to scrub their seats with Windex or dish soap, which is a disaster. It strips the oils and turns the leather brittle. The side bolsters take the most abuse from you sliding in and out, while headrests get gross from hair oils. This isn't just about looks; it's about not losing five grand in cabin value.
- Sun damage and UV cracking
- Wear and tear from entry/exit
- Dye transfer from clothing
- Spills (coffee, food)
- Damage from cleaning products
When to fix it yourself
Let’s be realistic: some leather care tasks are within the realm of DIY, while others absolutely require a professional. Basic cleaning and conditioning are good starting points. A gentle leather cleaner and a quality conditioner can help maintain the leather’s suppleness and prevent cracking. However, even these simple tasks require caution—always test products in an inconspicuous area first.
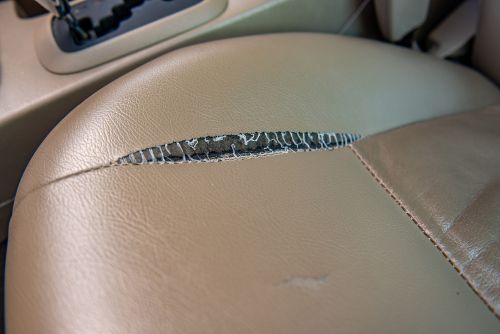
When it comes to significant damage – rips, deep cracks, extensive discoloration – DIY kits often fall short. They may provide a temporary fix, but the results rarely look professional and can sometimes make the problem worse. The color matching alone is incredibly challenging. Getting an exact match is crucial, and even slight variations are noticeable. I’ve seen too many DIY attempts that ended up looking patchy and uneven.
Improper techniques can cause further damage. Over-application of filler, aggressive sanding, or the use of incorrect dyes can all lead to irreversible problems. If you're not confident in your abilities, it's best to leave it to the professionals. It might cost more upfront, but it will save you money and headaches in the long run. Remember, a botched DIY repair can actually decrease your car’s resale value.
How to handle minor repairs
Assuming you're tackling a minor repair yourself, the first step is always thorough cleaning. Remove any dirt, grime, or debris with a dedicated leather cleaner. Then, gently dry the area. Next comes color matching, and this is where things get tricky. Take a sample of your leather to an auto parts store or a professional supplier to get a close match. A YouTube video from LEATHER EXPERT PROFESSIONAL LEATHER SEAT REPAIR () provides a helpful visual guide.
Once you have the correct color, apply a leather filler to any cracks or scratches. Use a small spatula or applicator to carefully fill the damaged area, ensuring it's level with the surrounding leather. Allow the filler to dry completely, then gently sand it smooth. This prepares the surface for re-dyeing. Apply the leather dye in thin, even coats, allowing each coat to dry before applying the next. This builds up the color gradually.
Finally, apply a leather protective coating to seal the repair and prevent future damage. This coating will also help to restore the leather’s natural sheen. Patience is key throughout this process. Rushing any step can lead to a subpar result. Follow the instructions on the products carefully, and don’t be afraid to take breaks. It’s better to take your time and do it right than to rush and make mistakes.
- Clean the leather thoroughly.
- Match the leather color.
- Apply leather filler to cracks.
- Sand the filler smooth.
- Re-dye the leather in thin coats.
- Apply a leather protective coating.
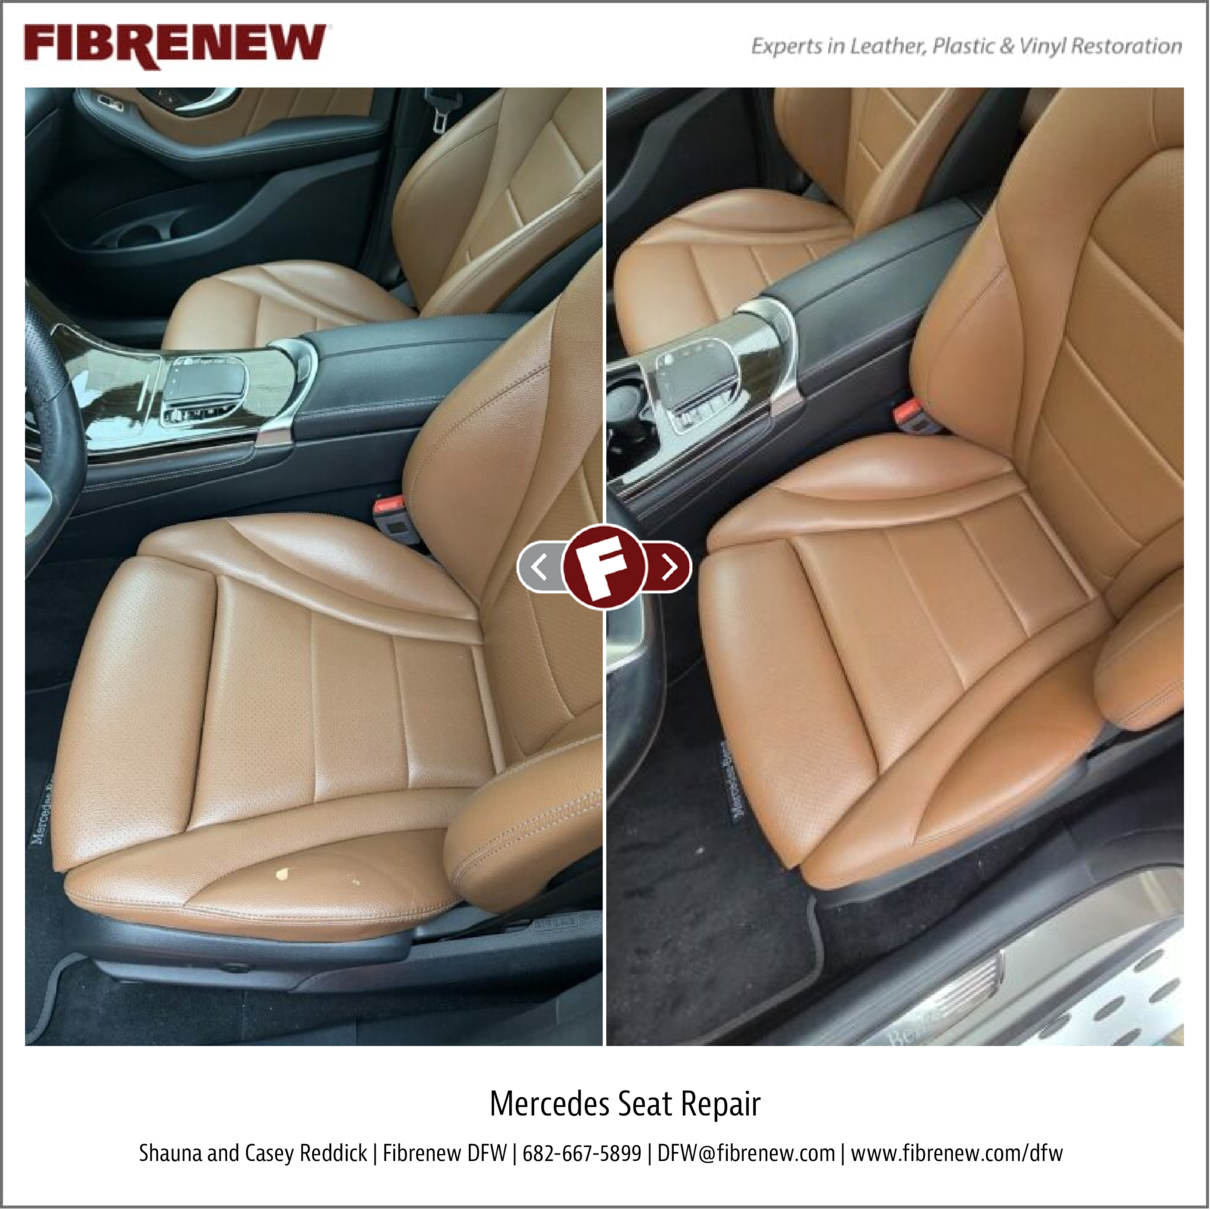
Hiring a pro
A professional leather repair or restoration typically involves a more comprehensive process. Minor touch-ups might include cleaning, conditioning, and color restoration. More extensive damage may require filling, re-dyeing, and the application of a protective coating, similar to the DIY process but executed with greater expertise and specialized equipment. Full seat re-dyeing is a significant undertaking, involving stripping the old finish and applying a new one.
In severe cases, complete leather replacement may be necessary. This is the most expensive option, but it’s often the only way to restore the original look and feel of the seats. Finding a reputable shop specializing in automotive leather is crucial. Look for shops with experienced technicians and a proven track record. Car Upholstery Orlando is one example of a service that specializes in this sort of work.
Cost ranges vary widely depending on the extent of the damage and the shop's location. A minor touch-up might cost around $150-$300, while a full seat re-dye could run $800-$2000 or more. Complete leather replacement can easily exceed $3000. It’s always best to get multiple quotes and ask detailed questions about the repair process.
Preventative Care: Extending Leather Life
Preventative care is the best way to protect your investment. Regular cleaning – every few weeks – is essential. Use a dedicated leather cleaner and a soft microfiber cloth. Conditioning the leather every 3-6 months helps to keep it supple and prevent cracking. UV protection is also crucial. Tinted windows or parking in the shade can significantly reduce the damaging effects of the sun.
Prompt spill cleanup is vital. Blot up any spills immediately with a clean cloth. Avoid harsh chemicals, such as bleach or ammonia, as these can damage the leather. Instead, opt for pH-balanced leather cleaners. Leather protectants create a barrier against stains and wear. I personally recommend products from Chemical Guys and Meguiar’s, but there are many good options available.
We often advise customers to consider seat covers, especially if they have young children or pets. While they may not be the most aesthetically pleasing option, they provide an extra layer of protection. At AutoBodyRX, we believe a little preventative maintenance goes a long way in preserving the beauty and value of your luxury EV’s interior.
No comments yet. Be the first to share your thoughts!