
Tesla Model Y Interior: What You Need to Know About Its Materials
Tesla interiors are not indestructible. The Model Y uses synthetic surfaces that are prone to scuffs and scratches from daily use. Understanding what your interior is made of is the first step to repairing it properly. Tesla doesn’t use traditional leather across the board; a lot of the "leather" surfaces are actually synthetic materials, which react differently to repair products than genuine hide.
The seats, steering wheel, and dashboard often utilize a combination of materials. You'll find polyurethane (PU) – a common synthetic leather – along with various plastics and fabrics. Identify the material before cleaning, as some chemicals cause polyurethane (PU) to crack or discolor. For example, harsh chemicals can cause PU leather to crack or discolor.
Common scratch points include the area around the door handles, the center console where keys or bracelets might rub, and the sides of the seats where passengers slide in and out. The trim pieces, though more durable, can still be susceptible to scratches from sharp objects. I’ve noticed the white interiors show scratches more readily, and require a bit more attention.
Before you even think about grabbing a repair kit, identify what you’re working with. A simple test is to check the care label (if there is one) or consult your Tesla owner’s manual. If you’re still unsure, a small, inconspicuous test patch with a cleaning product is always a good idea. And remember, some damage is best left to the professionals – especially if it's a large or complex area.

Diagnosing the Damage: Types of Scratches and Wear
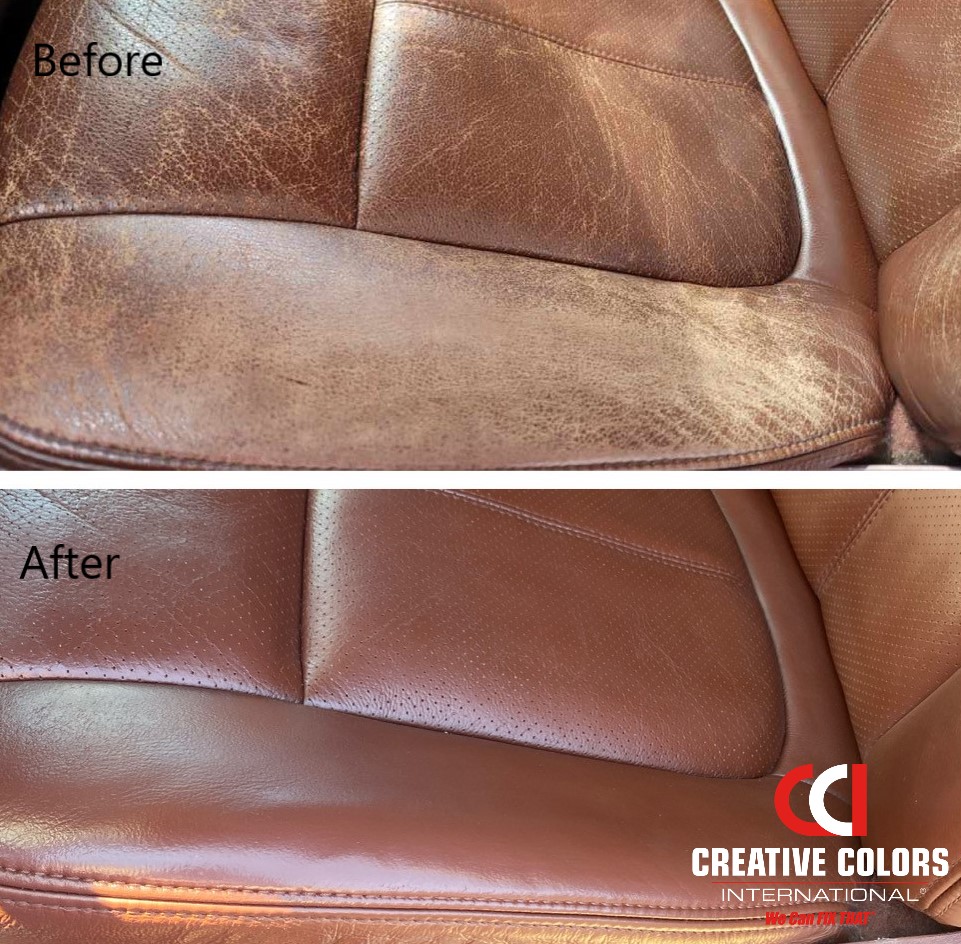
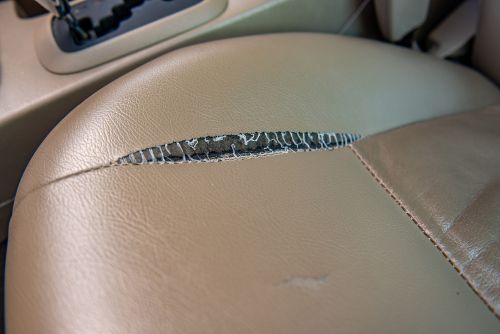
Not all scratches are created equal, and the repair approach differs significantly depending on the severity. We can generally categorize damage into four types: light surface scratches, deeper gouges, color fading, and cracking. Light scratches are usually superficial and only affect the top coating of the material.
Deeper gouges penetrate further and may require a filler to restore the surface. Color fading occurs over time due to sun exposure or wear, and can make the affected area look dull or patchy. Cracking is the most serious type of damage, and often indicates that the material is deteriorating. I’ve seen cracking particularly on older Model Y interiors exposed to intense sunlight.
Assessing the severity is key. A light scratch will feel smooth to the touch, while a deeper gouge will have a noticeable indentation. Color fading is usually visible when comparing the damaged area to an undamaged section. Cracking is obvious – you’ll see visible splits or fissures in the material. A good magnifying glass can be really helpful here.
Knowing when to call it quits is just as important as knowing how to fix something. If the damage is extensive, or if you’re uncomfortable attempting the repair yourself, it’s best to get a quote from Tesla service or a reputable auto upholstery shop. Don’t risk making the problem worse!
- Light Scratches: Superficial, affects top coating.
- Deeper Gouges: Penetrates further, requires filler.
- Color Fading: Dull or patchy appearance.
- Cracking: Visible splits in the material.
Essential Tools and Materials for DIY Tesla Interior Repair
Use a pH-neutral interior cleaner to avoid damaging the synthetic surfaces. Microfiber cloths are necessary because they do not leave lint. Microfiber cloths are your best friend; they’re soft, absorbent, and won’t leave lint. Beyond that, the specific tools depend on the type of damage.
For light scratches, a dedicated scratch remover for leather or vinyl is a must. For deeper gouges, you’ll need a leather filler, a color matching kit, and some fine-grit sandpaper. A small applicator brush or sponge is helpful for applying the filler and colorant. I use SEM Products for color matching and filling.
Don’t forget safety gear! Gloves are essential when working with chemicals, and a respirator mask is recommended if you’re sanding or applying spray products. Work in a well-ventilated area when using chemical fillers or sprays. And a good detailing brush can help get into tight spots.
I’ve wasted money on cheap scratch removers that just smear the damage around. Invest in quality products – it will save you time and frustration in the long run. A good leather conditioner is also essential for restoring moisture and protecting the repaired area. Don’t skimp on this step!
- Interior Cleaner (pH-neutral)
- Microfiber Cloths
- Scratch Remover (for leather/vinyl)
- Leather Filler (for gouges)
- Color Matching Kit
- Fine-Grit Sandpaper
- Applicator Brush/Sponge
- Gloves
- Respirator Mask
- Detailing Brush
- Leather Conditioner
Top Picks for Restoring Your Tesla Model Y Interior
Cleans dirt and grime from leather · Conditions and protects leather surfaces · Restores natural sheen and suppleness
This kit provides a comprehensive solution for cleaning and conditioning your Tesla's leather seats, essential for maintaining their look and feel.
Designed for automotive paint and trim · Clean removal without residue · Conforms to curves and edges
This high-quality masking tape is crucial for protecting surrounding areas when working on scratch repairs, ensuring clean lines and preventing accidental damage.
Removes scratches, oxidation, and blemishes · Restores color and clarity · Safe for clear coats
This compound is effective at removing light to moderate scratches from various interior surfaces, including plastics and trim, helping to restore a like-new appearance.
Safely cleans and protects interior surfaces · Removes dust, fingerprints, and smudges · Leaves a non-greasy, matte finish
A versatile cleaner for general interior touch-ups and light cleaning after scratch repair, ensuring all surfaces look uniformly clean.
Soft and absorbent microfiber material · Lint-free and scratch-free cleaning · Machine washable and reusable
These microfiber cloths are indispensable for applying cleaners, conditioners, and buffing surfaces without causing further scratches.
As an Amazon Associate I earn from qualifying purchases. Prices may vary.
Step-by-Step: Repairing Light Surface Scratches
Clean the area around the scratch with a pH-neutral cleaner to remove dirt that interferes with the bond. This removes any dirt or grime that could interfere with the repair. Make sure the area is completely dry before proceeding. A clean surface is key to a good outcome.
Next, apply a small amount of scratch remover to a clean microfiber cloth. Gently rub the scratch remover over the affected area, using circular motions. Don’t apply too much pressure – let the product do the work. Work in small sections, and avoid getting the scratch remover on undamaged areas. I usually start with a very light application and build up as needed.
After applying the scratch remover, buff the area with a clean, dry microfiber cloth. This helps to blend the repair and restore the shine. Use light, circular motions, and avoid applying too much pressure. Continue buffing until the scratch is no longer visible. It might take a few passes.
Finally, apply a leather conditioner to the repaired area. This helps to restore moisture and protect the material from future damage. Allow the conditioner to soak in for a few minutes, then buff off any excess. This step is often overlooked, but it’s essential for maintaining the health of your interior. The goal is a seamless blend – you shouldn’t be able to tell a repair was even made.
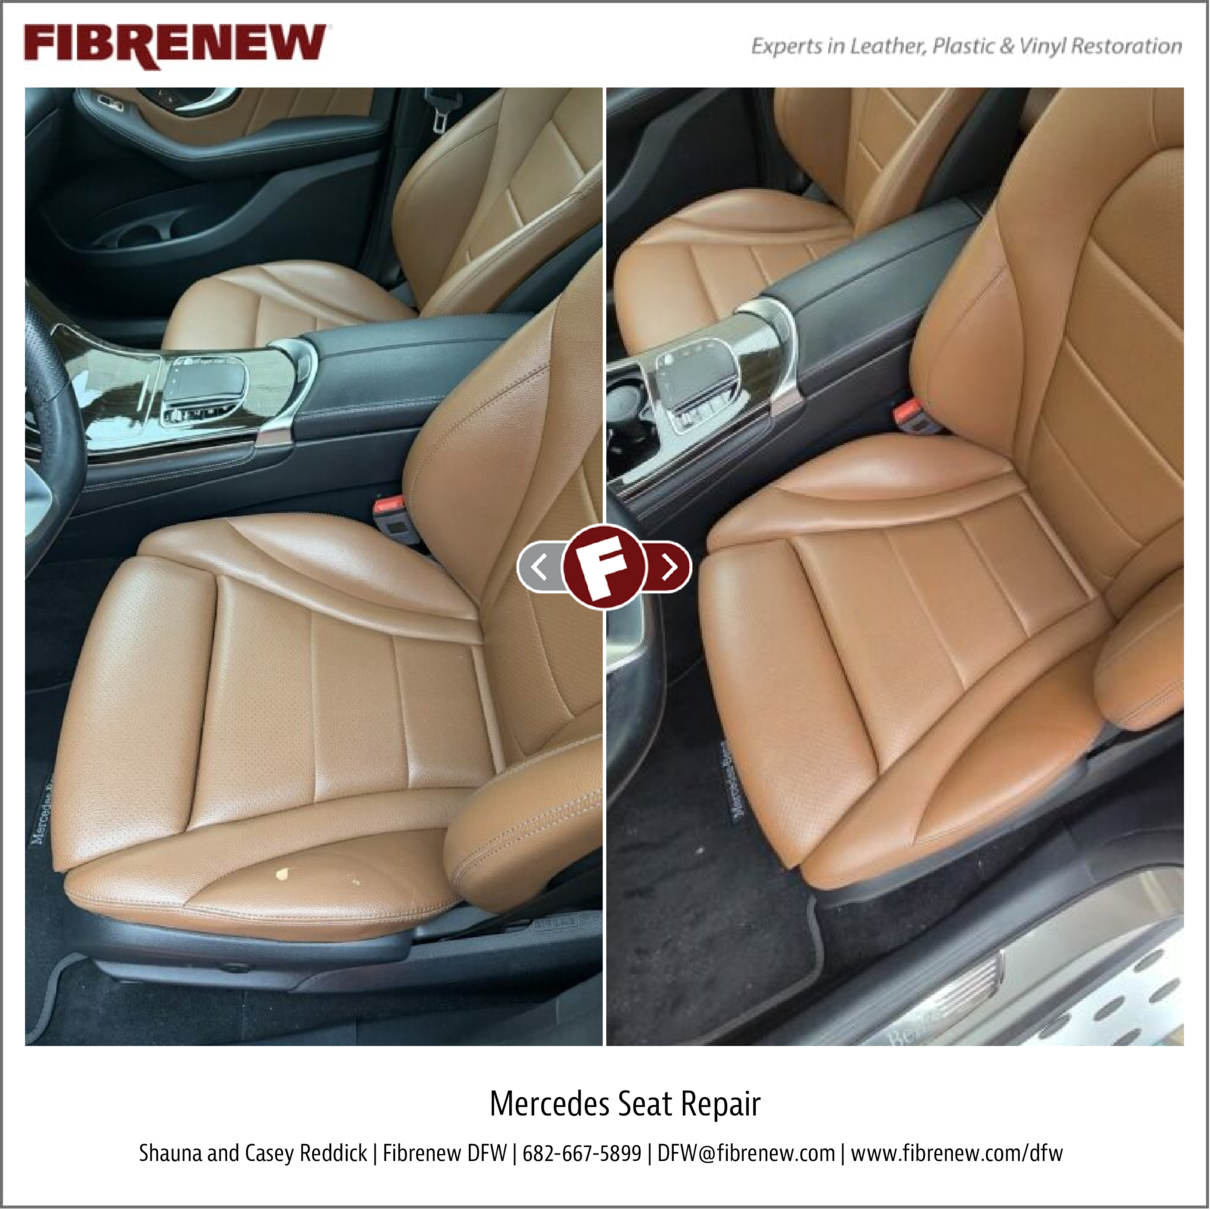
Tackling Deeper Scratches and Gouges: A More Involved Process
Deeper scratches and gouges require a bit more patience and skill. Start by cleaning the area thoroughly, just like with light scratches. Then, carefully sand the edges of the gouge with fine-grit sandpaper to create a smooth transition. Be gentle – you don’t want to create more damage.
Next, apply a thin layer of leather filler to the gouge, using a small applicator brush or sponge. Build up the filler gradually, allowing each layer to dry completely before applying the next. This prevents shrinking and cracking. It's important to avoid overfilling; you want the filler to be level with the surrounding surface.
Once the filler is dry, sand it smooth with fine-grit sandpaper. Again, be gentle and avoid damaging the surrounding material. Then, use a color matching kit to find a color that closely matches your interior. Apply the colorant to the filled area, using a small brush or sponge. You may need to apply multiple coats to achieve a good match.
After the colorant is dry, apply a clear coat to seal the repair and protect the color. Allow the clear coat to dry completely, then buff the area with a clean microfiber cloth. This process takes time and attention to detail, but the results can be surprisingly good. If you mess up, don’t panic – you can always sand it down and start over. Remember, practice makes perfect.
Repairing Faded or Cracked 'Leather' – When to Consider Alternatives
Severely cracked vinyl often requires re-dyeing or professional reupholstering. If the material has split to the backing, a DIY heat-cure kit is the only home option, though results vary.ence. You’ll need to thoroughly clean the surface, prepare it with a leather preparer, and apply multiple coats of dye. Color matching is critical, and even then, the results may not be perfect.
Applying a leather sealant can help to protect the material and prevent further cracking, but it won’t restore the original color or texture. Seat covers are a more practical solution for severely damaged interiors. They’re relatively inexpensive and can completely transform the look of your Model Y. I’ve seen some surprisingly stylish seat covers available online.
I’ll be honest: DIY re-dye jobs can often look worse than the original damage. If you’re not confident in your skills, it’s best to consult a professional. They have the tools, materials, and experience to achieve a high-quality repair. It’s worth getting a quote before attempting a DIY repair that could end up costing you more in the long run.
Sometimes, the cost of a professional repair is comparable to the cost of replacing the seat. In those cases, replacement might be the better option. Consider the overall condition of the interior and your budget before making a decision. A thread on Reddit discussing Tesla model Y leather repair suggestions highlights the popularity of seat covers as a cost-effective alternative.
Preventative Maintenance: Keeping Your Tesla Interior Looking New
An ounce of prevention is truly worth a pound of cure when it comes to your Tesla’s interior. Regular cleaning is the most important thing you can do to protect your seats and dashboard. Vacuum regularly to remove dirt and debris, and wipe down surfaces with a pH-neutral interior cleaner. I aim to do a quick wipe-down once a week, and a more thorough cleaning once a month.
Applying a leather conditioner every few months helps to keep the material supple and prevent cracking. Avoid using harsh chemicals or abrasive cleaners, as these can damage the surface. Consider using seat protectors, especially if you have pets or children. They’ll shield your seats from spills, scratches, and wear and tear.
Park your car in the shade whenever possible to minimize sun exposure. UV rays can cause fading and cracking over time. And finally, be mindful of what you bring into the car. Avoid carrying sharp objects that could scratch the interior, and be careful when getting in and out of the vehicle.
My personal routine is pretty simple: vacuum weekly, wipe down with cleaner, condition leather every three months, and use a sunshade when parked outside. It’s not about being obsessive, it’s about being proactive and protecting your investment. A little bit of effort goes a long way.
No comments yet. Be the first to share your thoughts!