
Identify your leather type
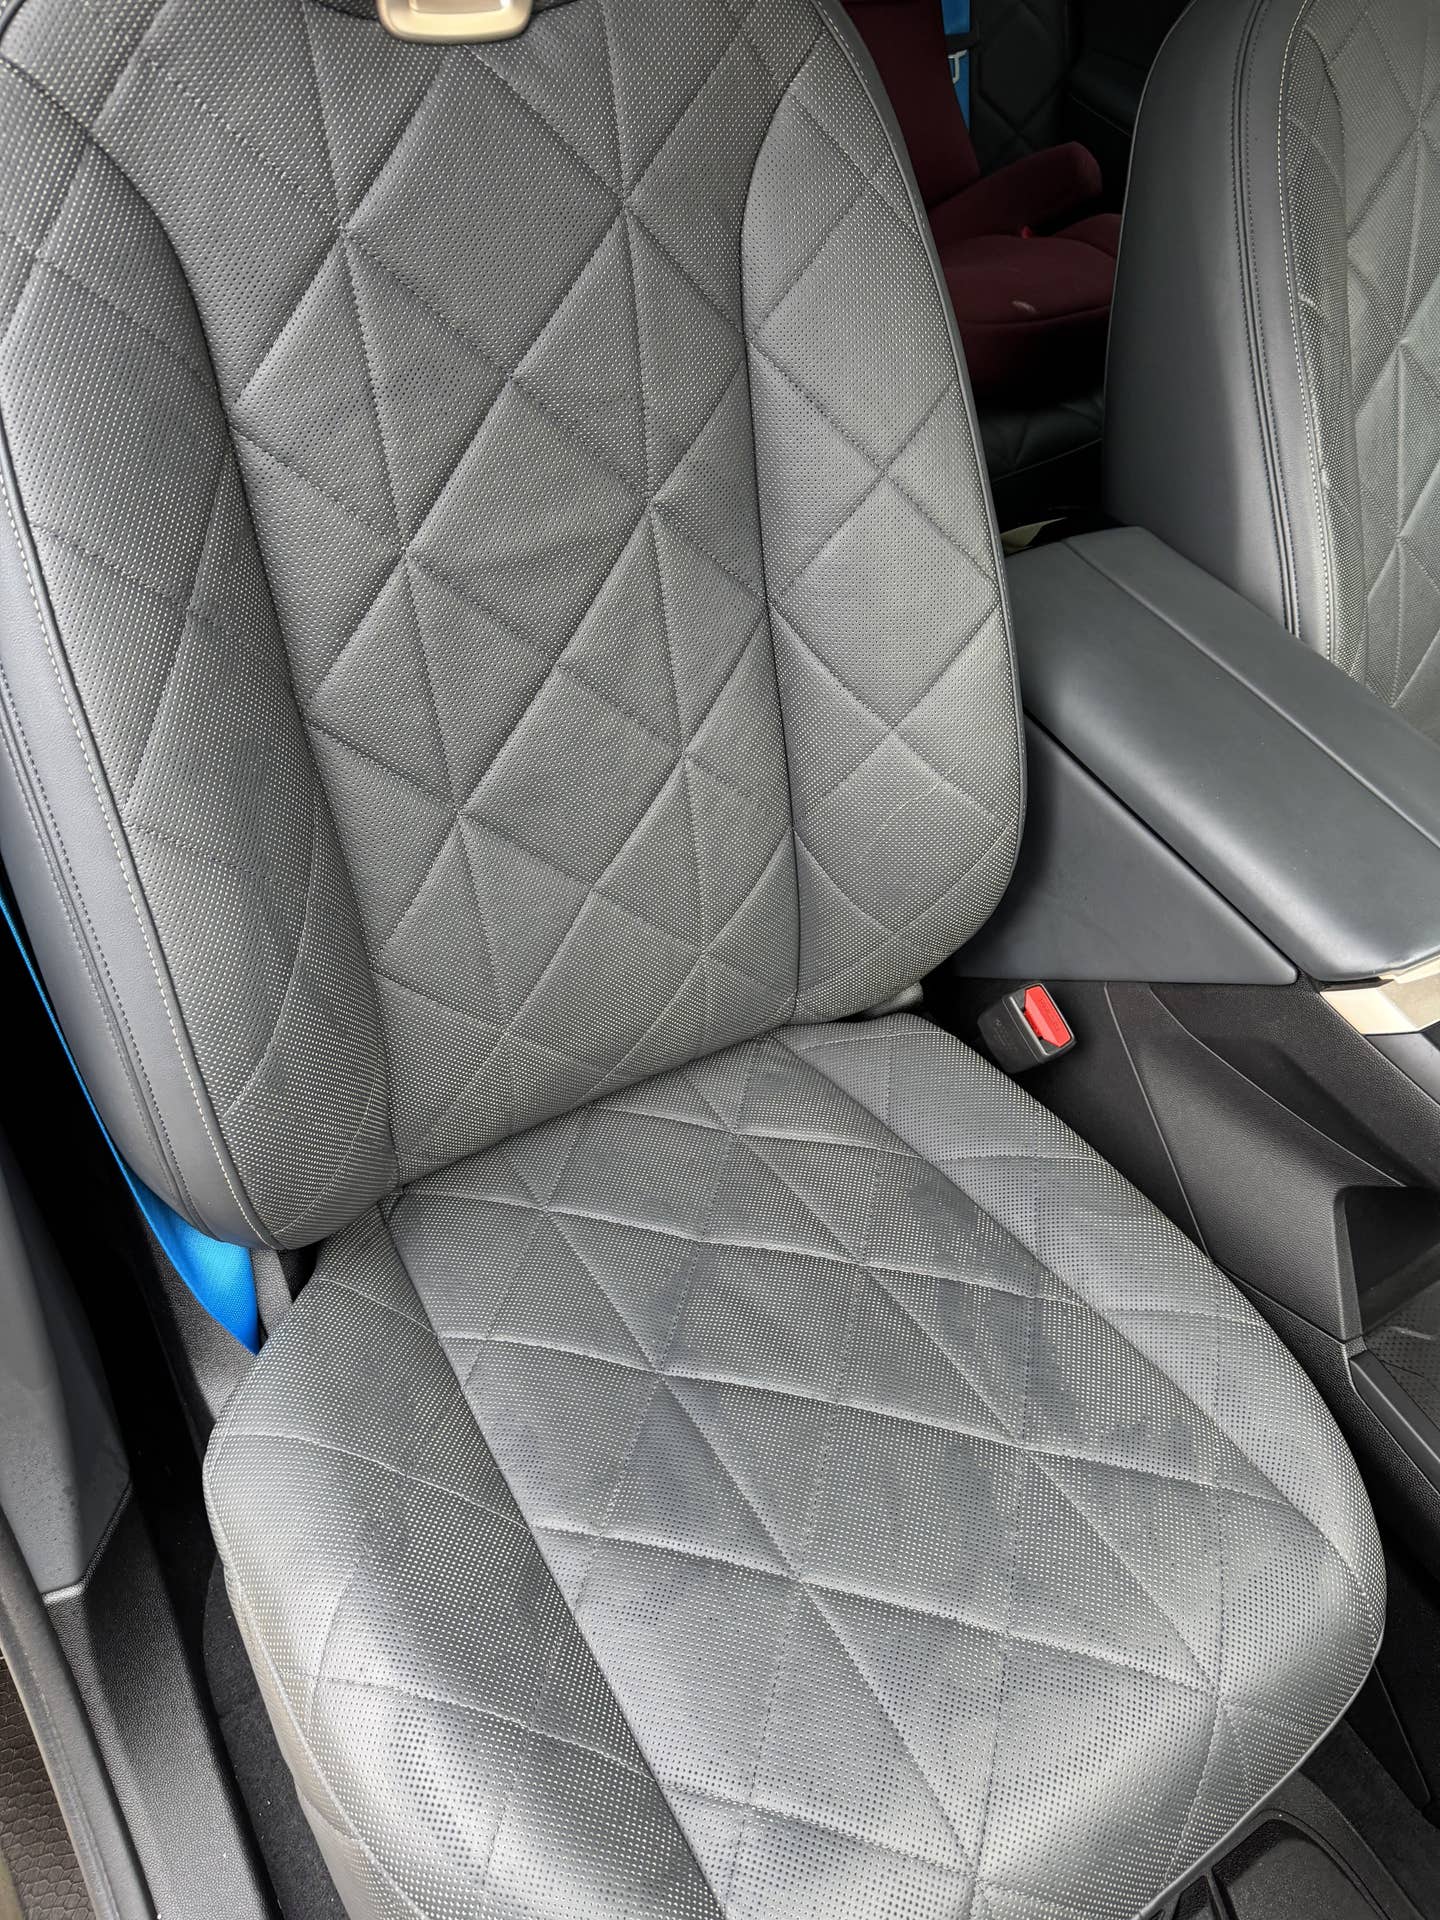
Luxury vehicles often feature premium leather interiors, and understanding the type of leather is the first step in proper care. Nappa leather, known for its incredibly soft feel, is a popular choice, but it’s also relatively delicate. Merino leather, sourced from Merino sheep, is even softer and more luxurious, but commands a higher price. You’ll also find corrected-grain leather, where imperfections are sanded away and an artificial grain is applied – this is more durable but doesn’t have the same natural beauty.
The quality of the tanning process significantly impacts the leather’s longevity. Vegetable-tanned leather is more eco-friendly and develops a beautiful patina over time, while chrome-tanned leather is more common due to its speed and lower cost. Synthetic leather, or pleather, is increasingly used as an alternative, but it requires a different approach to repair – often involving specialized adhesives and coatings rather than traditional leather restoration techniques.
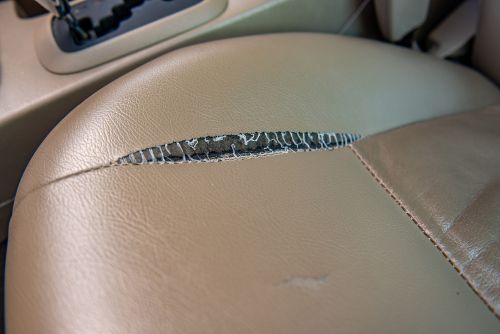
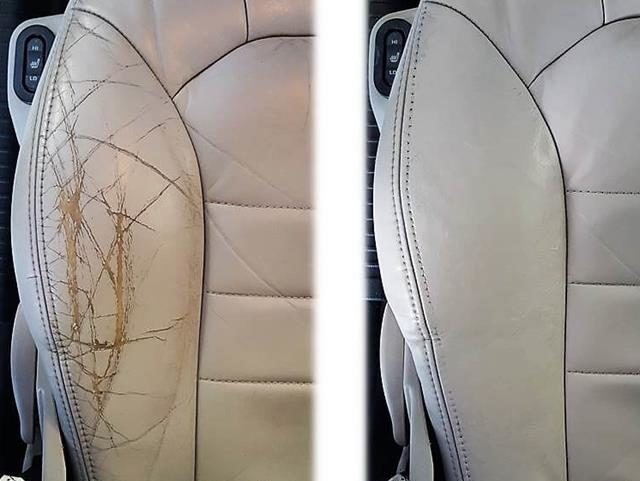
Common types of damage include cracking, caused by dryness and UV exposure; tearing, often from sharp objects or stress; fading, due to sunlight; staining from spills like coffee or ink; and general wear patterns in high-contact areas like the seat bolsters. Recognizing these types of damage is essential for choosing the right repair method. A small crack is a far easier fix than a large tear that extends through multiple layers of the leather.
When to call a professional
Leather damage ranges from surface scuffs to structural tears. You can handle minor fading with a standard conditioning kit from a local shop. If you have deep cracks or holes, hire a pro. Trying to patch a major rip without experience usually ends with a sticky, mismatched mess that costs more to fix later.
DIY repairs typically require a leather cleaner, a leather conditioner, dyes or color restorers, patching materials (leather or vinyl), and adhesive. You'll also need applicators like sponges, brushes, and potentially a heat gun for certain adhesives. Be aware that improper dye application can lead to uneven coloring, and incorrect adhesive use can damage the underlying foam and seat structure.
Check local business listings for shops that specifically mention automotive upholstery. Look for photos of completed work on high-end interiors rather than just reading star ratings. A shop that handles classic car restorations is usually a safe bet for luxury leather.
- Assess the Damage: Is it a small scuff or a large tear?
- Gather Supplies: If DIY, ensure you have the correct cleaning, conditioning, and repair products.
- Test in an Inconspicuous Area: Before applying any dye or adhesive, test it on a hidden part of the seat.
- Don't Rush: Take your time and follow instructions carefully.
Fixes for common damage
Small Tears (under 1 inch): A DIY leather repair kit can often handle these. These kits typically include a leather adhesive, a backing material, and color-matching compounds. Clean the area, apply adhesive to the backing, position it under the tear, and use the color-matching compound to blend the repair. A professional will likely use a similar method, but with higher-quality materials and more precise color matching.
Larger Rips (over 1 inch): These are best left to professionals. They’ll likely involve patching the leather with a piece from a donor seat or using a specialized leather patch. The patch is then carefully stitched and blended to match the surrounding leather. A DIY attempt often results in a noticeable and unsightly repair. The cost for a pro repair on a rip like this could range from $150 to $400 depending on the size and location.
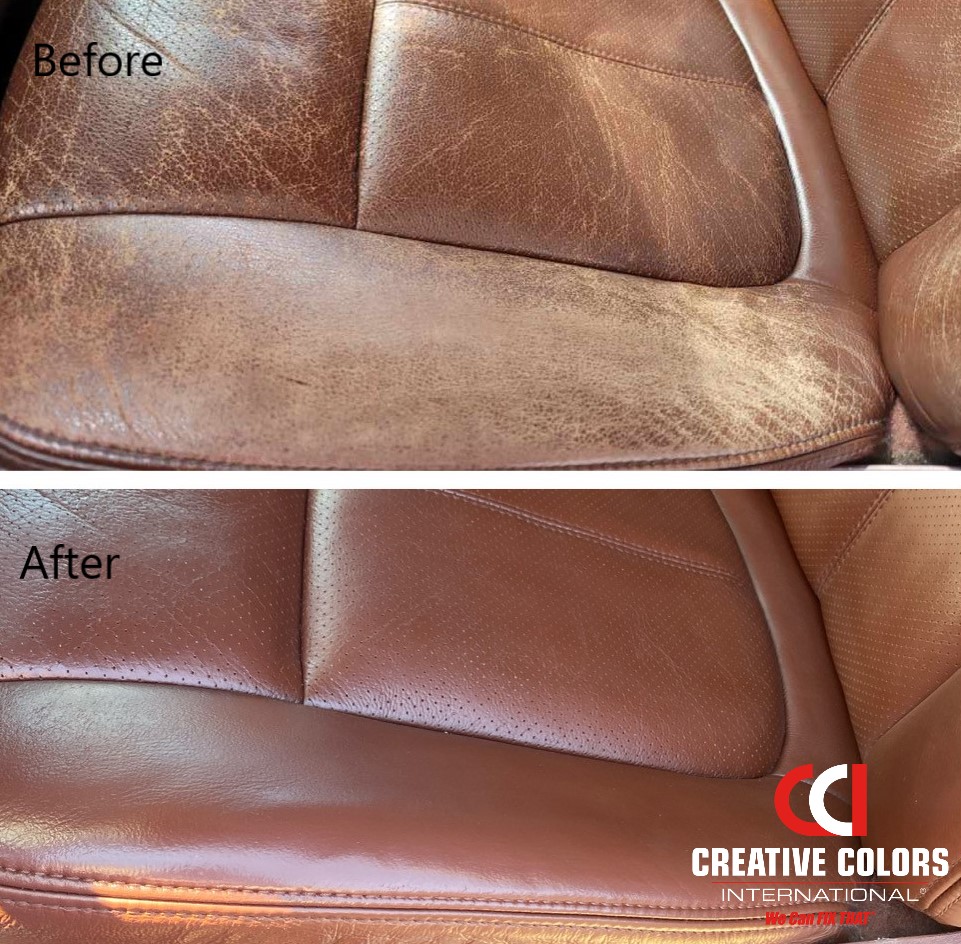
Cracking: Cracking is usually caused by dryness. A good leather conditioner can sometimes improve the appearance of minor cracking, but severe cracking often requires re-dyeing or, in extreme cases, a full leather replacement. Professionals use specialized dyes and sealants to restore the leather’s flexibility and color. They may also use a leather filler to smooth out the cracked surface.
Fading: Sunlight is a major culprit for fading. Leather dyes can restore the original color, but it’s important to use a dye specifically designed for automotive leather. Professionals have access to a wider range of colors and techniques to achieve a seamless blend. A good quality UV protectant applied after repair is essential to prevent future fading.
Stains (Coffee, Ink, etc.): Immediate action is crucial. Blot the stain (don’t rub!) and use a leather cleaner designed for the specific type of stain. For stubborn stains, a professional may use a specialized stain remover or, in some cases, re-dye the affected area. Remember, different stains require different cleaning approaches – what works for coffee won’t necessarily work for ink.
Seam Separation: This often requires re-stitching the seam. A professional will carefully disassemble the seat, re-stitch the seam using a heavy-duty sewing machine and durable thread, and then reassemble the seat. A DIY attempt can be tricky, as improper stitching can weaken the seam further. If the leather around the seam is also damaged, patching may be necessary.
Leather Cleaning & Conditioning: Preventative Care
Regular cleaning and conditioning are the most effective ways to prevent leather damage. Dirt, body oils, and UV rays all contribute to drying and cracking. Aim to clean your leather seats every 1-3 months, depending on usage and climate. Use a pH-balanced leather cleaner specifically designed for automotive interiors – avoid harsh chemicals or all-purpose cleaners.
After cleaning, always apply a leather conditioner. Conditioner replenishes the natural oils in the leather, keeping it soft and supple. Choose a conditioner that doesn't contain silicone, as silicone can actually dry out the leather over time. Apply the conditioner sparingly and allow it to absorb for several hours before wiping off any excess.
Protecting your leather from sun damage is also crucial. Park in the shade whenever possible, or use a windshield sunshade to block direct sunlight. Consider applying a UV protectant to the leather after cleaning and conditioning. This will help to prevent fading and cracking. Quick action with spills is also vital – blot them immediately, don’t rub, and use a leather cleaner as soon as possible.
- Clean: Use a pH-balanced leather cleaner every 1-3 months.
- Condition: Apply a silicone-free leather conditioner after cleaning.
- Protect: Use a UV protectant to block sun damage.
- Address Spills Immediately: Blot, don't rub, and clean promptly.
Finding a Reputable Leather Repair Specialist
Choosing the right repair specialist is vital for a quality result. Start by looking for shops with experience specifically in automotive leather repair. Certifications from organizations like the Institute of Inspection, Cleaning and Restoration Certification (IICRC) can be a good sign of professionalism. Check online reviews on platforms like Yelp ( ) and Google Reviews, paying attention to both the overall rating and the details of the comments.
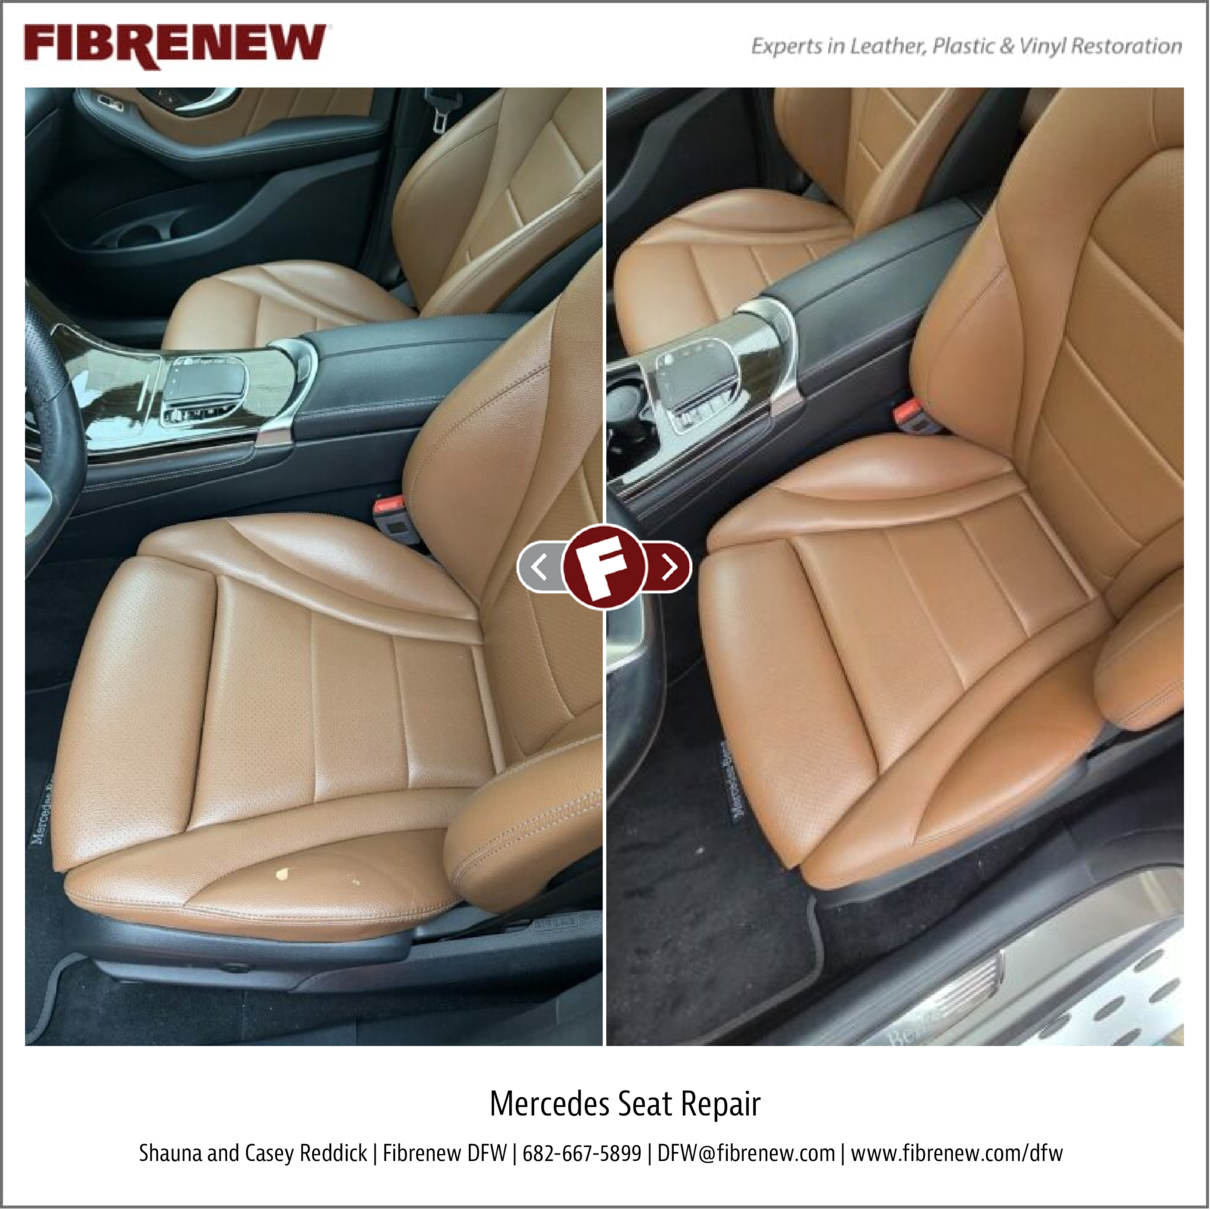
Don’t hesitate to ask potential shops about their experience with luxury brands like Lexus, BMW, or Mercedes-Benz. These brands often use unique leather types and require specialized repair techniques. Also, inquire about the warranty they offer on their work – a reputable shop should stand behind their repairs. Getting multiple quotes is always a good idea to compare pricing and services.
Local car enthusiast groups are often better than general review sites. Search for brand-specific owners' clubs in your city. These members are usually picky about their interiors and will tell you exactly which local technicians to avoid.
- Experience: Look for shops specializing in automotive leather.
- Certifications: IICRC certification is a good sign.
- Reviews: Check Yelp, Google, and Facebook for customer feedback.
- Warranty: Ensure the shop offers a warranty on their work.
- Quotes: Get multiple quotes to compare pricing and services.
Restoration vs. Replacement: A Cost Analysis
Determining whether to repair or replace your leather seats depends on the extent of the damage and your budget. Minor tears, cracks, and fading can usually be repaired for a few hundred dollars. However, if the damage is extensive – covering a large area of the seat or affecting multiple panels – replacement may be the more cost-effective option.
Full seat replacement costs vary significantly depending on the vehicle model and the availability of replacement seats. For some luxury vehicles, a complete leather seat replacement can easily exceed $1,500 per seat. Repair costs, even for significant damage, are often less than half that amount. Consider also the impact on the vehicle's resale value – well-maintained leather interiors can significantly increase a car’s appeal.
A general guideline: if the repair cost exceeds 50-60% of the replacement cost, replacement is usually the better choice. However, if you’re attached to the original seats or want to maintain the vehicle’s originality, repair may be worth the investment. Pricing will also vary by location; labor costs are higher in some areas than others.
- Repair (Minor Damage): $150 - $500
- Repair (Significant Damage): $500 - $1,000+
- Replacement (Per Seat): $800 - $2,000+
Repair or Replace? A Qualitative Decision Matrix for Leather Seat Damage
| Damage Level | Typical Repair Cost | Typical Replacement Cost | Recommended Action |
|---|---|---|---|
| Minor (Scuffs, small color fades) | Low | Medium | Repair |
| Moderate (Small tears <1 inch, noticeable wear) | Medium | High | Consider Repair |
| Moderate (Significant color loss, cracking) | Medium | High | Consider Repair |
| Severe (Large tears >1 inch, extensive cracking) | High | Very High | Replace |
| Severe (Split seams, foam damage) | High | Very High | Replace |
| Moderate (Localized wear on bolsters) | Medium | High | Consider Repair |
| Minor (Small stains) | Low | Medium | Repair |
| Severe (Widespread damage affecting structural integrity) | High | Very High | Replace |
Illustrative comparison based on the article research brief. Verify current pricing, limits, and product details in the official docs before relying on it.
New repair tech
The field of leather repair is constantly evolving. Advanced dye technologies are allowing for more precise color matching and more durable repairs. Laser repair techniques are also emerging, offering a non-abrasive way to repair small tears and cracks. These techniques use a focused laser beam to fuse the leather fibers together, creating a strong and virtually invisible repair.
New patching materials, made from synthetic leather that closely mimics the look and feel of genuine leather, are also becoming available. These materials are often more durable and resistant to fading than traditional leather patches. Research into bio-based leather alternatives is ongoing, and these materials could offer a more sustainable option for repairs in the future.
While these technologies are promising, they are not yet widely available. They tend to be more expensive than traditional repair methods and require specialized training and equipment. However, as the technology matures and becomes more accessible, it’s likely to become more commonplace in leather repair shops.
No comments yet. Be the first to share your thoughts!