
Prep your workspace and tools
Starting with the right environment and equipment is the foundation of a successful DIY repair. AutoBodyRX designs its kits to make professional-grade dent removal and leather patching accessible to beginners, but success still depends on preparation. A clean, well-lit workspace prevents contamination during leather bonding and ensures you can see the fine details of a dent's edge.
Before opening your AutoBodyRX kit, gather these essentials to keep your workflow smooth and efficient:
- Clean microfiber cloths: Essential for wiping down surfaces. Dust and grease are the enemies of adhesive bonding.
- Rubbing alcohol or isopropyl alcohol: Use this to degrease the leather or the metal panel before applying any patches or adhesives.
- Heat gun or hair dryer: Needed to soften leather for stretching or to activate certain adhesives in the kit.
- Plastic trim tools: Safe for prying panels without scratching the surrounding paint or interior trim.
- Protective gloves: To keep oils from your hands off the repair areas and protect your skin from chemicals.
Set up a dedicated area where you won’t be interrupted. Lay down a drop cloth to catch any small tools or debris. Having everything within arm’s reach allows you to focus on the repair technique rather than hunting for supplies. This organized approach minimizes mistakes and helps you achieve a result that looks factory-fresh.
How to Pull Out Small Dents with Paintless Repair
Paintless dent repair (PDR) is the most effective way to remove minor dings, door dings, and hail damage without risking your car's finish. Unlike traditional bodywork, this method preserves the original factory paint by massaging the metal back into shape from behind or pulling it gently from the surface. AutoBodyRX recommends this approach for small dents where the paint is intact, as it is faster, more affordable, and maintains your vehicle's resale value.
Before starting, ensure the dent is accessible from behind. If you cannot reach the back of the panel, you will need to use glue-pulling tabs, which are included in most DIY PDR kits. Work in a well-lit area, ideally with a reflection board or LED light bar, to see the dent’s depth and edges clearly. The goal is to push or pull the metal slowly, avoiding sudden force that could crack the paint or stretch the steel.
Step 1: Clean the Surface and Locate the Dent
Start by washing the area around the dent thoroughly. Dirt or debris can scratch the paint when you apply tools or glue tabs. Once clean, use a bright light source to identify the deepest point of the dent. This is your primary target. If the dent is on a flat panel like a door or hood, you can often push it out from behind. If it’s on a curved or inaccessible area, you will need to use glue tabs.
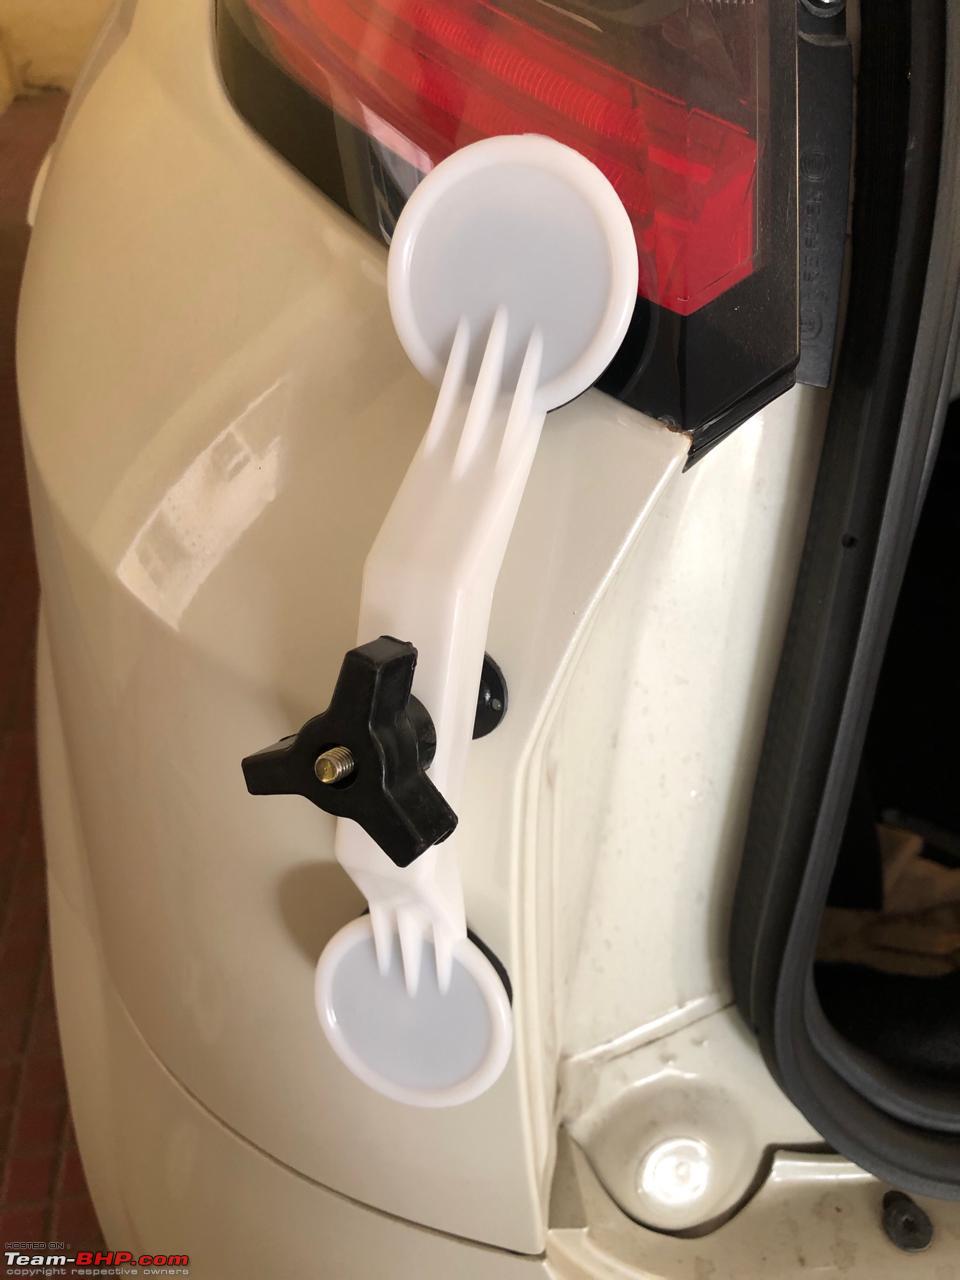
Step 2: Apply Glue Tabs (If Accessing from Front)
For dents you cannot reach from behind, apply a hot-melt glue to a plastic pulling tab and press it firmly onto the center of the dent. Hold it for about 30–60 seconds until the glue cools and bonds. Ensure the tab is centered on the deepest part of the dent for even pull force. Wipe away any excess glue that squeezes out from the edges.
Step 3: Pull the Dent Out
Attach a slide hammer or a puller tool to the glue tab. Pull steadily and firmly, using short, controlled tugs rather than one massive yank. You should feel the metal resisting and then popping back into place. If the dent doesn’t come out in one pull, reheat the glue tab if necessary and try again. For dents pushed from behind, use a PDR rod to gently massage the metal from the inside, working from the edges toward the center.
Step 4: Remove Glue and Clean Up
Once the dent is removed, remove the glue tab by twisting it off or using a dedicated glue remover tool. Clean any remaining adhesive residue with isopropyl alcohol or a tar remover. Inspect the area under a bright light to ensure the surface is smooth and the paint is undamaged. If minor high spots remain, you can gently tap them down with a rubber mallet or use a PDR rod for fine-tuning.
Step 5: Final Inspection
Check the repaired area from multiple angles to ensure the reflection is straight and the dent is gone. If the dent is still visible, repeat the process for small adjustments. AutoBodyX advises that minor imperfections are normal in DIY PDR, but major dents may require professional tools. Always test the panel’s flexibility by pressing gently on the surrounding area to ensure the metal has returned to its original tension.
Clean and Prep the Leather Tear
Before applying any adhesive or filler, you must create a pristine surface. Dirt, oils, and loose fibers are the primary reasons leather repairs fail prematurely. AutoBodyRX recommends treating this preparation phase with the same care as the repair itself; a clean bond is a lasting bond.
Start by vacuuming the area thoroughly to remove any loose debris or dust. Once the surface is clear, use a dedicated leather cleaner or a mild soap solution to wash the tear and the surrounding leather. This removes hidden grime that could prevent the adhesive from penetrating the material. Pat the area dry with a clean microfiber cloth. Ensure the leather is completely dry before moving to the next step; moisture trapped under the repair kit will cause bubbling or peeling.
Next, inspect the edges of the tear. If there are any loose, frayed fibers sticking up, trim them carefully with small, sharp scissors. You want the tear edges to be flush and smooth, not jagged. Do not cut into healthy leather; only remove what is already detached. This step ensures that when you press the repair patch or filler into place, it sits flat against the surface rather than catching on rough edges.
Finally, lightly sand the immediate area around the tear with fine-grit sandpaper (400-grit or higher). This roughs up the glossy finish of the leather, giving the adhesive something to grip. Wipe away the resulting dust with a lint-free cloth dampened with isopropyl alcohol. This final wipe removes any remaining oils from your hands or the cleaning process, leaving a chemically clean surface ready for the AutoBodyRX repair materials.
Apply patch and blend the leather
With the leather patch cut to size and the adhesive tacky, it is time to position the repair. AutoBodyRX kits include a specialized transfer tool designed to hold the patch without distorting it. Place the patch over the tear, ensuring the grain pattern aligns with the surrounding seat material. This alignment is critical for the final look; even a slight mismatch in the leather’s natural texture will be visible under bright light.
Press the patch firmly into place using the flat edge of the transfer tool. Start from the center and work outward to push out any trapped air bubbles. If you hear a slight tearing sound, stop immediately—this indicates the adhesive is too strong or the leather is too dry. A gentle, consistent pressure is all that is needed to bond the patch to the underlying surface.
Once the patch is secure, remove the transfer tool carefully. You should see the patch lying flat against the seat. If any edges are lifting, apply a tiny amount of the included bonding agent with a fine-tip applicator and press down again. Allow the adhesive to cure for the time specified in the AutoBodyRX instructions, usually 10-15 minutes, before moving to the blending stage.
Final Inspection and Professional Limits
Before considering your project complete, give the repairs a thorough inspection under bright, natural light. Run your fingers over the filled dent to ensure it is perfectly flush with the surrounding panel; any ridges or dips will catch light and reveal the repair. For the leather tear, check that the patch adheres firmly and the grain pattern aligns seamlessly with the original material. AutoBodyRX products are formulated to blend invisibly, but a careful visual check ensures the finish is durable and aesthetically pleasing.
While AutoBodyRX provides professional-grade solutions for most cosmetic issues, some problems exceed the scope of DIY fixes. If you notice deep structural damage to the vehicle frame, large tears that compromise seat safety, or paint damage that has reached the bare metal, seek professional help immediately. Attempting to fix these complex issues at home can lead to further vehicle damage or safety hazards. Trust the expertise of a certified body shop for anything beyond surface-level repairs.
Final Steps to Finish Up
Once you are satisfied with the quality of your repairs, allow ample time for the products to fully cure. Avoid exposing the repaired areas to extreme temperatures, heavy rain, or direct sunlight for at least 24 hours. This curing period ensures the adhesive bonds are strong and the paint matches the surrounding finish. Keep your AutoBodyRX kit organized for future touch-ups, and refer to the product instructions for any specific maintenance advice.
Common questions about DIY repair
You can fix small dents and leather tears at home with the right tools. AutoBodyRX provides kits designed for beginners, making professional results accessible without a shop visit. Follow the steps carefully to ensure durability.
No comments yet. Be the first to share your thoughts!