
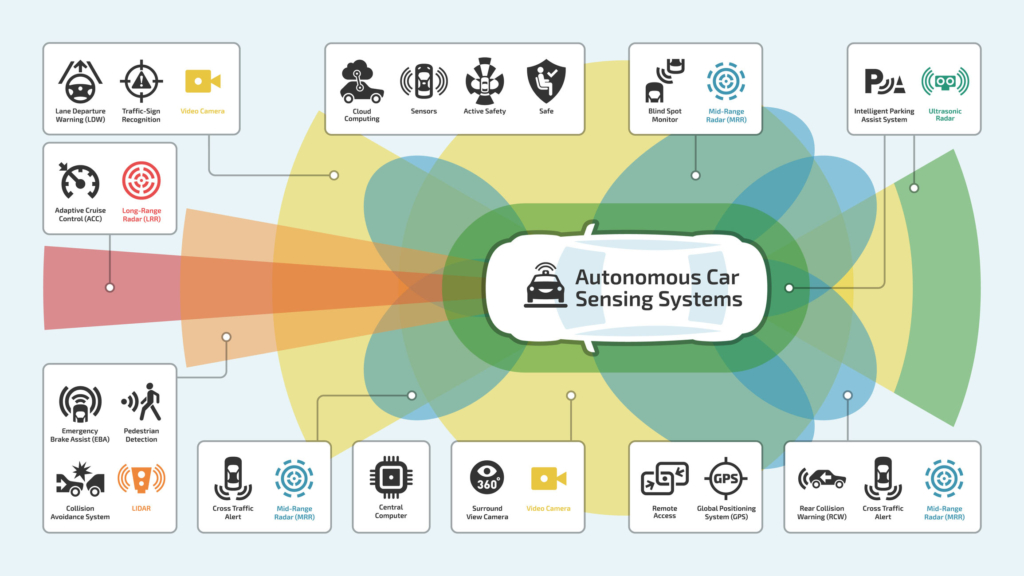
Modern vehicles are increasingly reliant on a network of sensors – cameras, radar, lidar, and ultrasonic sensors – to provide features we now consider essential for safety. These aren’t just about convenience; they power automatic emergency braking, lane keeping assist, adaptive cruise control, and even parking assistance. It’s a huge leap forward in automotive technology, but it also introduces a new dimension to car repair.
These sensors are, unfortunately, vulnerable. They’re often mounted in exposed locations, making them susceptible to damage from everyday occurrences like minor fender benders, road debris kicked up by other vehicles, and even harsh weather conditions. A small stone chip to a camera lens, or a slightly askew radar housing, can compromise the entire system.
Sensor failure is expensive because you aren't just paying for plastic. The hardware itself costs hundreds, and the labor to recalibrate the system often doubles that. If a sensor is off by even a fraction of a degree, your emergency braking might trigger for a shadow or miss a car entirely. You need to know where the DIY line is drawn before you start poking around a $1,000 radar unit.
Recognizing sensor damage is the first step in getting your vehicle safely back on the road. Obvious signs include cracked or broken sensor lenses, misaligned housings, and any physical obstructions blocking the sensor’s view. Even something as seemingly minor as dirt, ice, or snow can interfere with performance. Don’t forget to check for internal condensation within the sensor housing, which indicates a breach in the seal.
Even damage that appears superficial can affect how the sensor functions. A tiny scratch on a camera lens can distort the image and impact the accuracy of features like lane departure warning. Pay close attention to your dashboard. Warning lights like the ABS light, stability control light, or specific error messages related to adaptive cruise control or parking assist can signal a sensor issue.
Some damage is invisible. A sensor might look perfect but have internal circuit cracks or a mounting bracket that's bent just enough to ruin its field of view. If your dashboard is throwing error codes for cruise control or lane assist, stop guessing and get a diagnostic scan. It's better to pay for a scan now than a collision later.
There are a few things a car owner can safely do to address minor sensor issues. Carefully cleaning sensor surfaces is a good starting point. Use a mild soap and water solution, and a soft cloth. Avoid abrasive cleaners, harsh chemicals, and anything that could scratch the lens. Gently remove any obstructions like snow, ice, or dirt.
In some cases, you might be able to gently nudge a sensor housing back into alignment. However, proceed with extreme caution. Consult your owner's manual for specific instructions and warnings related to your vehicle’s sensors. If the housing feels stuck or you’re unsure about the proper alignment, do not force it.
It’s crucial to understand the limitations of DIY repairs. You can’t fix internal damage, recalibrate sensors, or diagnose complex electronic failures. These tasks require specialized knowledge, tools, and software. Attempting repairs beyond your skill level could worsen the problem and compromise your vehicle’s safety.
After any repair involving sensors, or even significant suspension work like replacing struts or lowering the vehicle, sensor recalibration is often necessary. This is because even minor changes in alignment can throw off the sensor’s accuracy. Recalibration isn't something you can accomplish with a standard OBD2 scanner; it requires specialized equipment and software specific to your vehicle’s make and model.
There are different recalibration methods, including static and dynamic recalibration. Static recalibration is performed with the vehicle stationary, using precise measurements and target alignment. Dynamic recalibration involves driving the vehicle under specific conditions to allow the sensors to learn and adjust. Both methods demand a level of precision that’s difficult to achieve without professional tools and expertise.
Incorrect recalibration can lead to serious safety issues, potentially causing the safety systems to malfunction. It can also void your vehicle’s warranty. The cost of recalibration typically ranges from $150 to $500 or more per sensor, depending on the vehicle and the complexity of the system. It’s a significant expense, but a necessary one to ensure your safety systems are functioning correctly.
If you notice any visible internal damage to a sensor, such as cracks within the housing or damaged wiring, it’s time to visit a professional. Similarly, if the sensor housing is cracked or broken, do not attempt a DIY repair. If you've tried to realign a sensor and are uncomfortable with the results, or are unsure if it's properly aligned, seek professional help.
If your car is displaying error messages related to the sensors or ADAS features, don’t ignore them. These messages indicate a problem that needs to be diagnosed and addressed by a qualified technician. Attempting to repair complex sensor issues yourself can be dangerous, expensive, and potentially illegal depending on local regulations.
A qualified auto body shop will have trained technicians, specialized equipment, access to Original Equipment Manufacturer (OEM) parts, and a warranty on their repairs. They understand the intricacies of ADAS and can ensure your vehicle’s safety systems are functioning as intended. It’s an investment in your safety and peace of mind.
Choosing the right auto body shop is crucial, especially when dealing with advanced sensor technology. Look for shops that have technicians certified by I-CAR, an international non-profit organization that provides training and certification in collision repair techniques. I-CAR certification demonstrates a commitment to quality and ongoing professional development.
Read online reviews on platforms like Yelp and Google Reviews to get an idea of the shop’s reputation and customer satisfaction. Ask about the shop’s experience specifically with ADAS recalibration. Don’t just ask if they can do it; ask how many vehicles like yours they’ve worked on.
Get a detailed estimate before authorizing any work. The estimate should clearly outline the cost of parts, labor, and recalibration. Inquire about the type of parts they use – OEM (Original Equipment Manufacturer) or aftermarket. While aftermarket parts may be cheaper, OEM parts are generally considered to be of higher quality and more reliable. A shop that offers a warranty on their work is also a good sign.
Essential Tools for Inspecting Autonomous Vehicle Sensor Damage
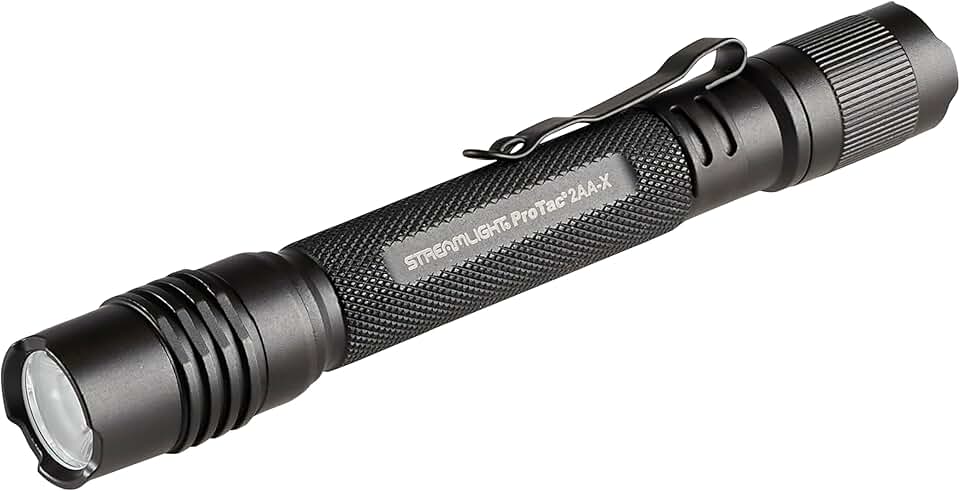
270-lumen output · 5,000-candela peak beam intensity · Rechargeable capable
This powerful flashlight is essential for illuminating and inspecting damaged sensor areas in low-light conditions.

60x-120x zoom magnification · Portable and handheld design · Includes smartphone clip for capturing images/video
Allows for close-up examination of minor sensor damage, helping to identify the extent of the issue before seeking professional help.

Cleans and protects multiple interior surfaces · Safe for dashboards, seats, carpet, glass, vinyl, leather, and plastic · Includes a professional-grade microfiber towel
Useful for cleaning away debris or residue around sensors that might obstruct their view or function, ensuring a clear initial assessment.

Full system diagnostic for BMW vehicles · Reads and clears trouble codes · Includes battery registration and service reset functions
Enables DIYers to check for diagnostic trouble codes related to sensor systems and understand potential electronic issues.
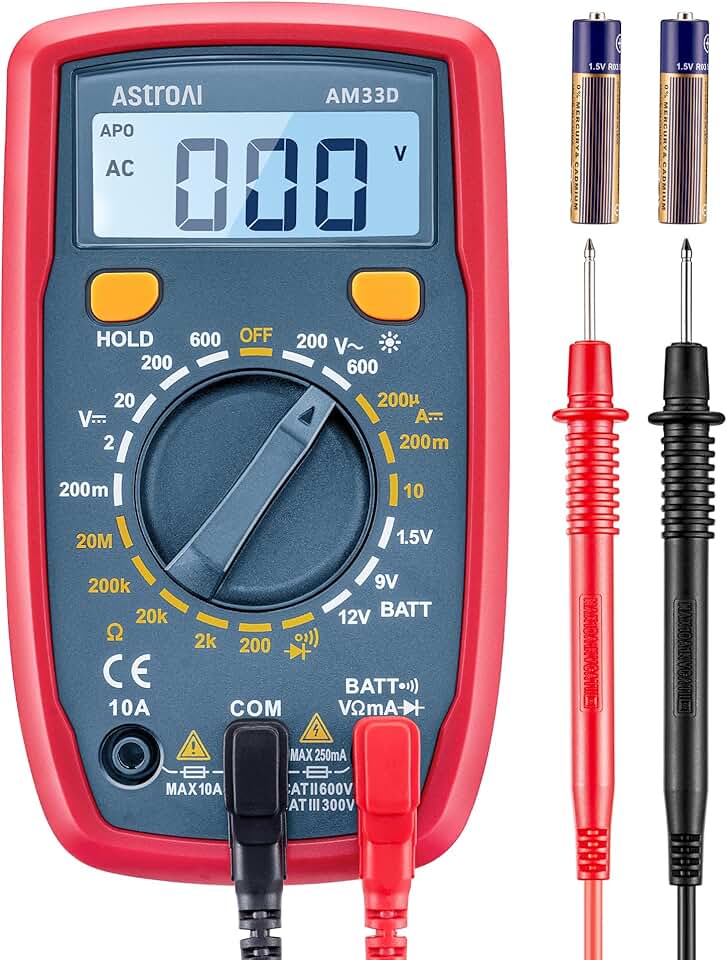
Measures AC/DC voltage, current, and resistance · Tests continuity and diodes · 2000 count display
A fundamental tool for checking electrical connections and voltage outputs related to sensor systems, aiding in preliminary diagnostics.
As an Amazon Associate I earn from qualifying purchases. Prices may vary.
Let’s look at a realistic cost comparison. Basic DIY cleaning supplies – mild soap, water, a soft cloth – will likely cost between $20 and $50. A basic OBD2 scanner, useful for reading some error codes, can range from $50 to $200. However, these address only a small portion of potential issues.
Recalibration almost always requires a professional. Expect to pay between $150 and $500 or more per sensor for recalibration services. The cost varies depending on the vehicle make and model, and the type of sensor. Sensor replacement costs can range from $300 to $2000+ depending on the specific sensor and vehicle.
Attempting a DIY repair that goes wrong can quickly become more expensive than going to a professional in the first place. You could end up damaging other components, requiring even more costly repairs. It’s often better to invest in professional expertise upfront to avoid a larger financial burden down the road.
- Cleaning supplies: $10 (microfiber and water)
- Basic OBD2 Scanner: $50 - $200
- Professional calibration: $250 - $600 per session
- Sensor Replacement: $300 - $2000+
Autonomous Vehicle Sensor Damage: DIY vs. Professional Repair Risk Assessment
| Damage Severity | DIY Attempt | Professional Repair |
|---|---|---|
| Minor Obstruction (e.g., dirt, bug splatter) | Low Risk - Cleaning is generally safe with appropriate cleaning solutions designed for sensitive optics. Consult your vehicle’s manual. | Low Risk - Professional cleaning ensures no damage and thorough inspection. |
| Visible Crack in Sensor Housing | Medium Risk - Attempting repair could worsen the damage and compromise sensor calibration. Potential for moisture ingress. | Medium Risk - Requires sensor replacement and recalibration, potentially costly, but restores functionality and safety. |
| Sensor Error Message Displayed | High Risk - Indicates potential internal failure. DIY attempts at disassembly are likely to void warranties and cause further damage. Diagnostic tools are usually required. | Low to Medium Risk - Professional diagnostics pinpoint the issue. Repair or replacement is performed with calibrated equipment. |
| Impact Damage (e.g., from a collision) | High Risk - Significant potential for internal damage and misalignment. DIY repair is not recommended. Could affect the entire ADAS system. | High Risk - Requires comprehensive assessment, potential sensor replacement, and full ADAS recalibration. Frame damage may also be present. |
| Internal Damage (suspected, no visible cause) | Very High Risk - Requires specialized tools and knowledge to diagnose. Disassembly will likely cause further damage and void warranties. | Medium Risk - Professionals have access to diagnostic software and can accurately identify internal failures. Replacement is often necessary. |
| Scratched Sensor Lens | Medium Risk - Minor scratches *may* not affect performance, but can degrade sensor accuracy. Polishing attempts can cause further distortion. | Low Risk - Professional assessment can determine if replacement is needed. Replacement ensures optimal performance. |
| Sensor Loosening/Misalignment | Medium Risk - Attempting to re-align without proper tools and calibration procedures can worsen the issue and affect ADAS functionality. | Low Risk - Professionals use specialized equipment to precisely align sensors and perform necessary recalibration. |
Illustrative comparison based on the article research brief. Verify current pricing, limits, and product details in the official docs before relying on it.


No comments yet. Be the first to share your thoughts!