
Assess the dent before you start
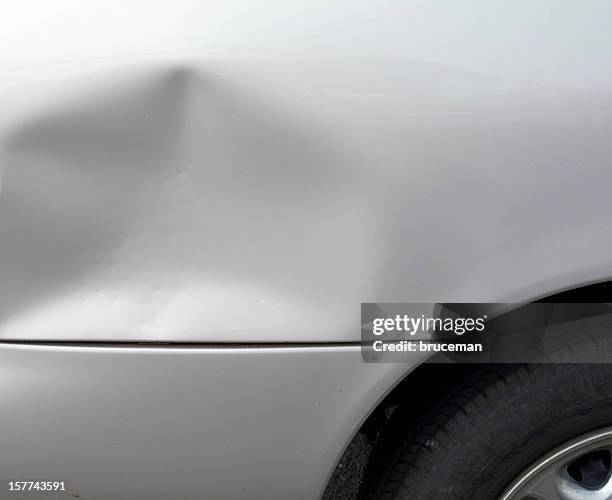
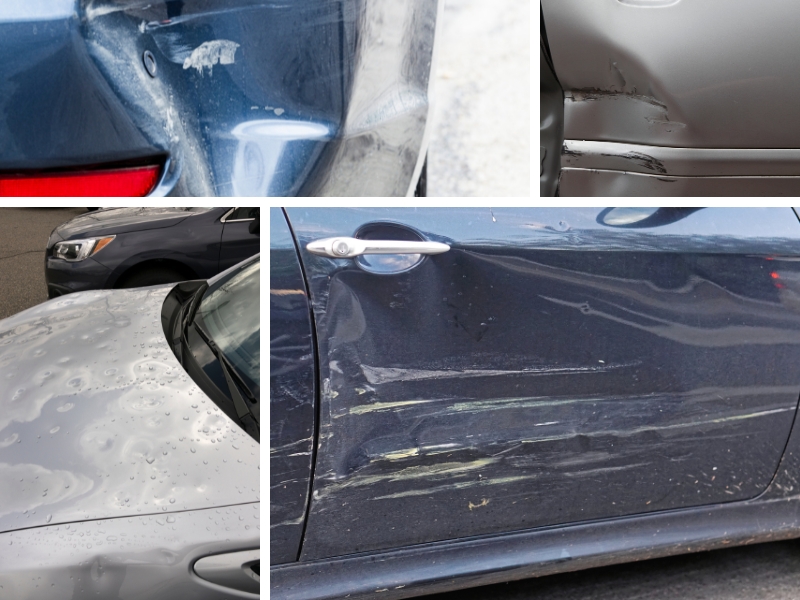
Before buying supplies or applying heat, take a close look at the damage. Not every imperfection is a candidate for DIY fixing car dents. The repair method depends entirely on the dent's location, depth, and how the metal reacted to the impact.
If the paint is cracked, chipped, or flaking, paintless dent repair (PDR) is off the table. DIY suction cups or glue-pulling kits cannot restore the factory finish. You will need body filler, primer, and paint to cover the break. Similarly, if the metal is stretched or creased sharply, the steel has yielded beyond its elastic limit. Forcing it back often results in a weak spot that will rust or crack later.
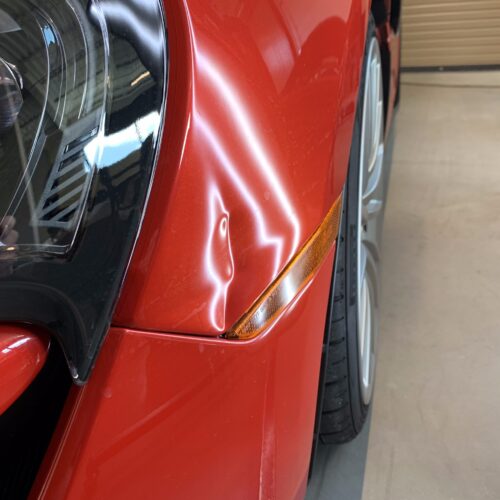
Sharp body lines, such as those running along door edges or fender creases, are difficult to manipulate without specialized tools. The metal here is rigid and holds its shape tightly. Attempting to push these out from behind or pull them from the front usually leaves a visible ripple. If the dent is on a double-walled panel or near a structural brace, access may be impossible without removing interior trim.
Small, shallow dings on flat panels like hoods or quarter panels are the easiest targets. These areas have enough flexibility for heat and suction or glue-pulling techniques to work. The metal retains its memory, allowing it to bounce back to its original shape once the force is released. If the dent is small and the paint is intact, you likely have a straightforward project. If it looks complex, a professional assessment is worth the cost to avoid ruining the panel.
Gather your dent repair tools
You can tackle most small dings and dents with a handful of affordable tools found at hardware or auto parts stores. The right setup depends on the repair method you choose, but focusing on the essentials for fixing car dents keeps the project manageable and safe.
Start with a heat source if you plan to use the hot water or hair dryer method. A hair dryer gives you more control than boiling water for small surface imperfections. For deeper dings where you can access the back of the panel, a dent pulling kit or a suction cup puller works well. These tools grip the paint and pull the metal back into shape without damaging the finish.
If you need to flatten minor low spots, a rubber mallet and a hard wood block are better than a steel hammer. The rubber head absorbs shock, preventing new dents or paint chips. Always wear safety glasses and nitrile gloves to protect your eyes and skin from debris and adhesives.
Use heat and cold to pop small dents
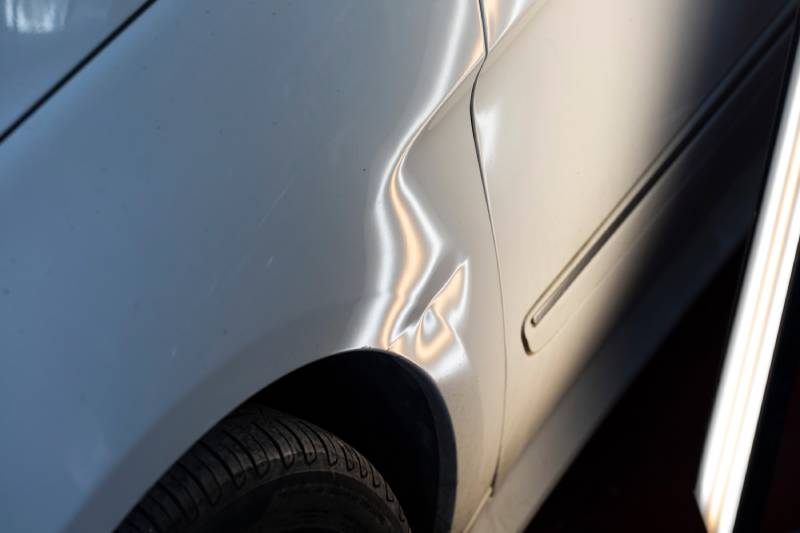
The heat and cold method relies on thermal expansion and contraction to push shallow dents back into place. When the metal expands from heat and then rapidly contracts from extreme cold, it can snap back toward its original shape. This technique works best for small, rounded dings on panels where you can access the back side.
Before starting, clean the dented area thoroughly. Remove any wax, dirt, or debris so you can see the metal clearly and prevent scratching the paint during the process. You will also need a pair of thick work gloves to protect your hands from the cold and heat.
Plug in a hair dryer and set it to the highest heat setting. Hold it a few inches away from the dent and move it in a circular motion. Heat the area for 30 to 60 seconds until the metal feels hot to the touch but not scorching. This expands the metal and makes it more pliable.
Immediately flip a can of compressed air duster upside down. This releases the propellant as a freezing cold gas rather than the liquid. Spray the heated dent directly for 5 to 10 seconds. The rapid temperature drop causes the metal to contract violently, often popping the dent out.
Inspect the panel. If the dent remains, wait a few minutes for the metal to return to room temperature, then repeat the heating and cooling cycle. You may need to perform this process several times to fully restore the panel's contour.
This method is a low-cost way to tackle minor cosmetic issues, but it is not a substitute for professional paintless dent repair on large or sharp creases. If the paint cracks or the metal does not spring back, the damage may be too severe for this DIY approach.
Pull out deeper dents with a kit
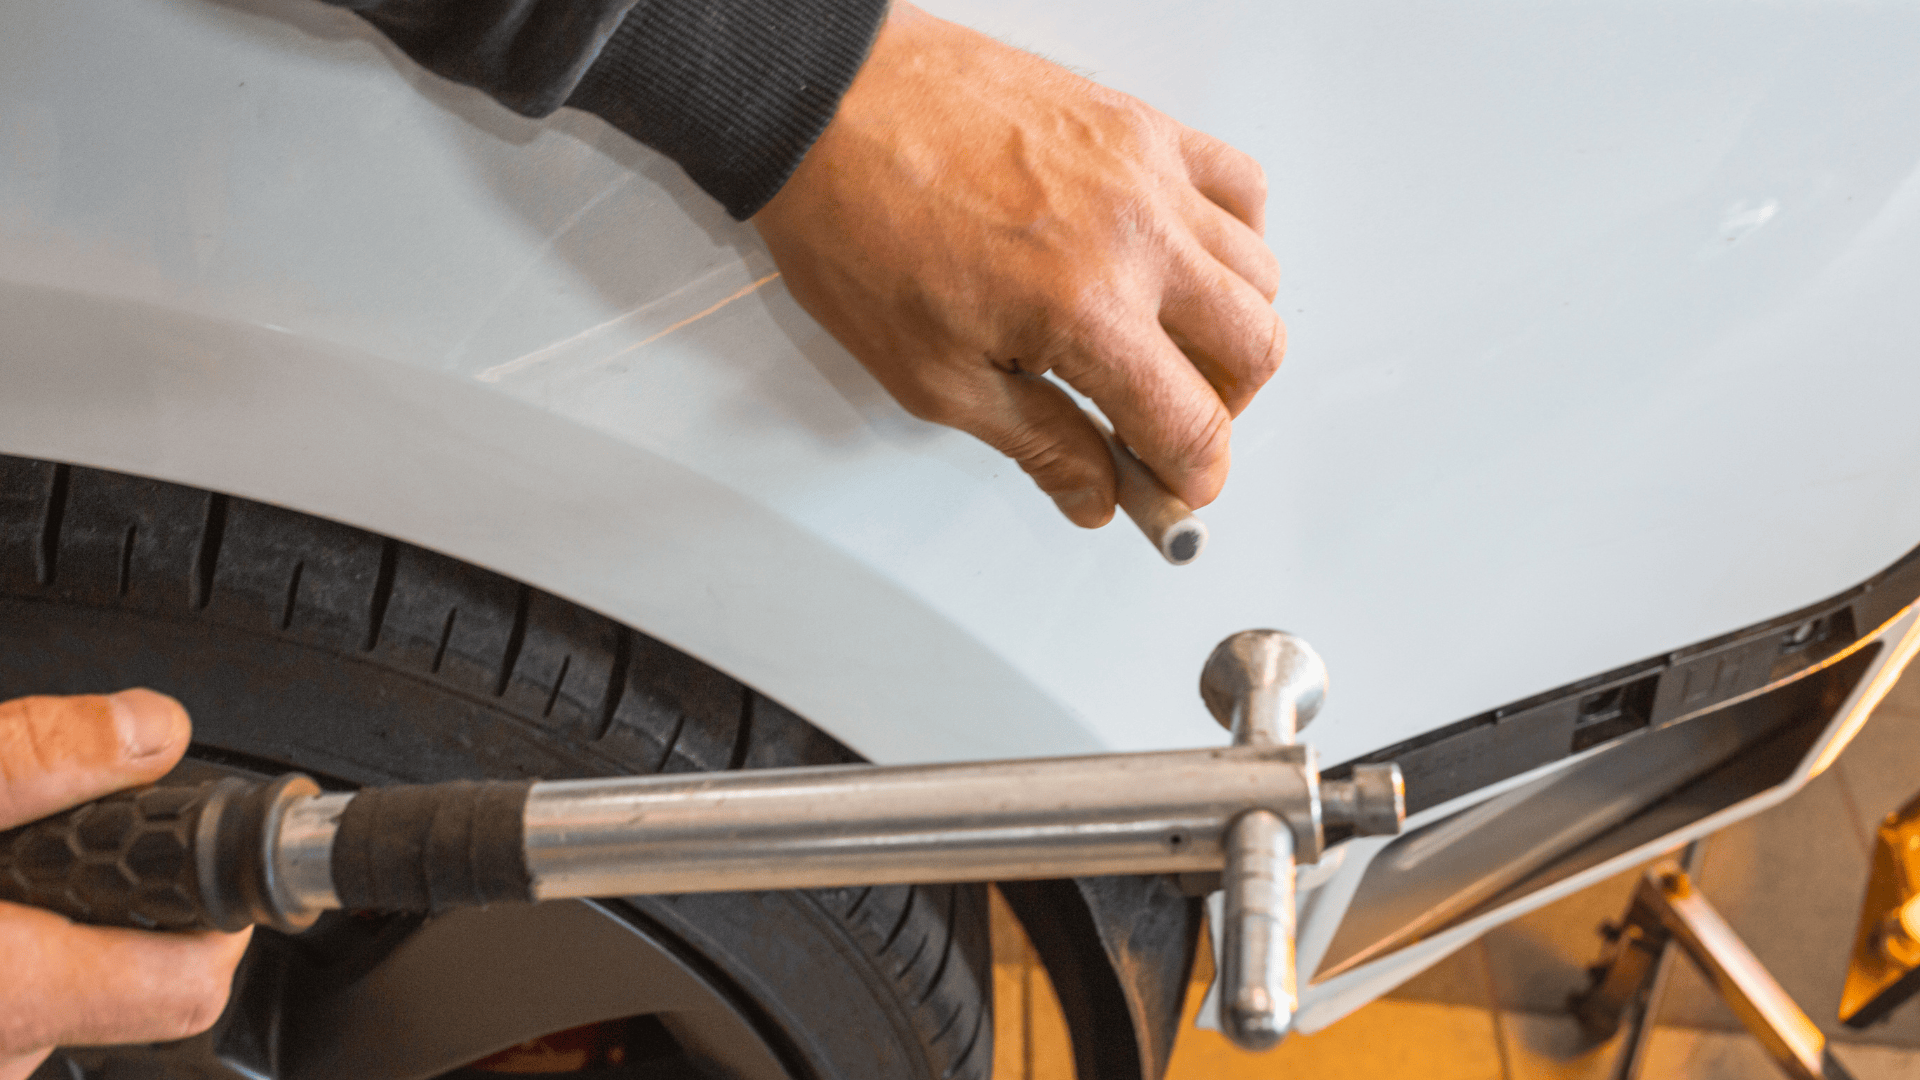
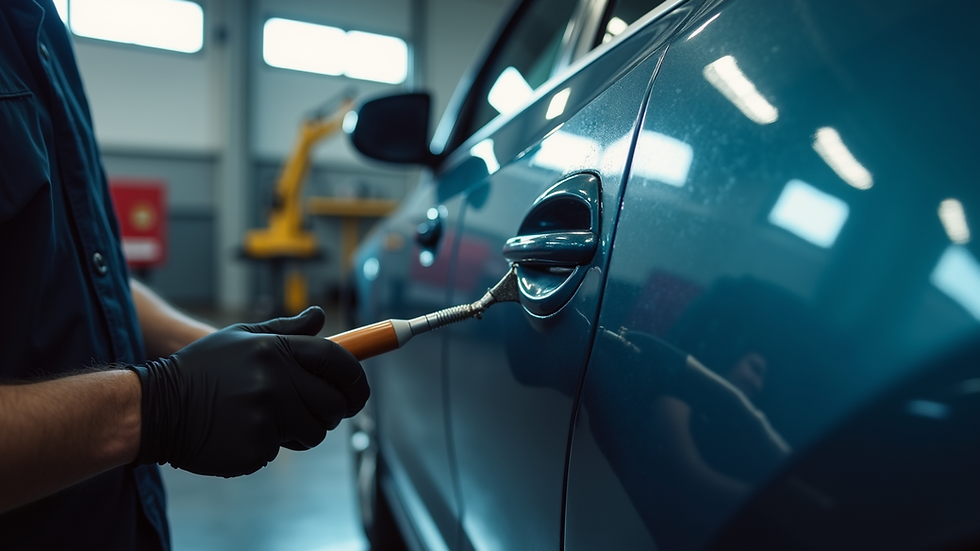
Heat and cold tricks work well for shallow creases, but they won't move metal that has been pushed in hard. When the dent is stubborn, you need mechanical leverage. A dent pulling kit or a strong suction cup plunger gives you the physical force required to pop the panel back into shape.
This method is the standard approach for fixing car dents that are too rigid for temperature changes alone. You are essentially pulling the metal from the outside to restore the factory contour. The process is straightforward, but it requires patience and the right tools.
Dirt and wax prevent suction cups from gripping. Use isopropyl alcohol or a dedicated automotive cleaner to wipe down the dent and the surrounding area. Let it dry completely before proceeding. A clean surface ensures the plunger or glue tabs stick firmly during the pull.
For a plunger kit, press the rubber cup directly over the center of the dent. Squeeze out the air to create a vacuum. If using a glue-pulling kit, attach the plastic tab to the center of the dent using the hot glue gun. Wait for the glue to cool and harden completely so it won't slip under tension.
Pull straight out on the handle. Do not jerk the tool; sudden force can crack the paint or stretch the metal too far. Use a slow, consistent pull to lift the dent. If the dent is large, you may need to pull in stages, moving the plunger slightly with each attempt to cover the entire area.
Once the dent pops out or rises significantly, release the suction or cut the glue tab gently. If using glue, slide a fishing line or dental floss behind the tab to slice through the adhesive without damaging the paint. Avoid pulling the tab straight off, which can rip the paint finish.
Run your hand over the repaired area to feel for any remaining low spots. The metal may not be perfectly flush immediately. If a small bump remains, you can use a rubber mallet and a block of wood to tap it down gently, or use a plunger to pull it out slightly more.
This technique works best on dents where the paint is intact and the metal hasn't been stretched beyond its limit. If the metal is cracked or the paint is chipped, professional repair or repainting is necessary. For minor imperfections left after pulling, body filler and sanding can smooth the surface before touch-up paint is applied.
Fill and sand for major damage
Some dents pull the metal so far out of shape that pulling them back isn't enough. When the metal is stretched or creased, you need to build the surface back up using body filler. This process turns a deep divot into a flat, paint-ready panel.
The goal here isn't to fill the hole with thick goo. It is to apply thin, controlled layers that match the original contour of your car. Think of it like sculpting with clay that hardens quickly. If you rush this step, the repair will show up later as a bump or a dip.
Sand the area down to bare metal
Before any filler touches the panel, you must remove paint and rust. Use 80-grit sandpaper on a sanding block to strip the paint from the dented area. Go slightly beyond the edges of the dent to give the filler something to grip. This creates a rough surface that acts like Velcro for the adhesive.
Wipe away all dust with a tack cloth or a rag soaked in wax and grease remover. If any residue stays on the metal, the filler will peel off within weeks. The surface should look matte and clean, not shiny or oily.
Mix the filler and hardener
Body filler comes in two parts: the paste and the hardener. Squeeze a pea-sized amount of hardener onto your mixing board for every inch of filler you plan to use. The exact ratio matters; too little hardener means it never cures, and too much makes it brittle and prone to cracking.
Mix the two ingredients thoroughly with a plastic spreader. You are looking for a uniform color with no streaks. If you see gray lines in the white paste, keep mixing. The clock starts ticking the moment the two parts touch, so work quickly.
Apply thin layers to build the shape
Spread the mixed filler over the sanded area using a flexible applicator. Apply it in thin layers, pressing firmly to push out air bubbles. Thick applications trap heat and air, leading to shrinkage or voids underneath. You want to build the filler slightly higher than the surrounding metal to account for sanding.
Let the first layer harden until it can be dented slightly with your fingernail. This usually takes 10 to 20 minutes depending on the temperature. Once it is firm enough to hold its shape, you can apply a second thin layer if needed to fill low spots.
Sand the filler smooth
When the filler is fully hardened, it will be rough and uneven. Start with 80-grit sandpaper to knock down the high spots and bring it close to the original panel height. Use long, sweeping strokes across the repair area to keep the surface flat.
Switch to 180-grit sandpaper to remove the scratches left by the coarser paper. As you sand, feel the surface with your hand frequently. You are looking for a transition so smooth that you cannot feel the edge where the filler meets the metal. If you feel a ridge, sand that spot down further.
Prime the repaired section
Body filler is porous and will soak up paint if left raw. Once the surface is perfectly smooth, apply a coat of high-build primer. This seals the filler and provides a uniform surface for your base coat. Use light, even coats to avoid running.
After the primer dries, wet-sand it with 400-grit paper to remove any orange peel texture. Wipe clean again, and your panel is ready for paint. This final preparation step ensures the paint adheres properly and the repair remains invisible.
Check your work and finish up
Before you consider fixing car dents complete, you need to verify the surface quality. Run your hand over the repaired area with bare fingers, not gloved ones. Your skin is more sensitive than gloves and will catch even tiny ridges or bumps that a visual inspection might miss. If you feel any unevenness, the filler was not sanded flat enough. Go back to 400-grit sandpaper and smooth it out until the transition between the repair and the original panel is completely invisible.
Next, check the paint match. Hold a flashlight at a low angle to the surface to reveal any color mismatches or "orange peel" texture differences. If the clear coat looks dull or uneven, a quick polish with a rubbing compound can often blend the repair into the surrounding paint. For minor touch-ups, use a pen-style paint applicator to dab on matching color only where the primer or bare metal is exposed. Avoid painting over the entire panel unless you have professional spray equipment, as mismatched clear coats will look obvious.
Final inspection checklist
-
Surface feels completely smooth under bare fingers
-
No visible edges or outlines where filler meets metal
-
Paint color matches the surrounding panel in direct sunlight
-
Clear coat gloss level is consistent with the rest of the door
Finalizing the repair
Once you are satisfied with the smoothness and color, clean the area one last time with a wax and grease remover. This ensures the new paint bonds correctly and prevents future peeling. If you used body filler, apply a thin layer of wax over the repair to protect it during the curing process. Your dent repair is now complete.
Run your fingers over the sanded area to detect any remaining ridges or bumps.
Check the color and gloss under bright light to ensure a seamless blend.
Wipe the area with wax and grease remover to prepare for final protection.
Common mistakes in dent repair
Even with the right tools, fixing car dents at home can go wrong if you rush the prep work or skip safety steps. The most frequent errors lead to visible imperfections, wasted materials, or rust that spreads under the new paint. Avoiding these pitfalls saves time and keeps the repair professional-grade.
Over-sanding the surface
Sanding is necessary to smooth out high spots, but aggressive sanding can dig into the surrounding clear coat or thin the metal too much. Use a fine-grit sandpaper for the final pass and check the surface frequently with your hand. If you sand through to bare metal in areas that shouldn't be exposed, you create new rust hazards that are harder to fix than the original dent.
Using too much body filler
Body filler is meant to level minor imperfections, not to fill large gaps. Applying thick layers causes shrinkage as it cures, leading to cracks or a "dished" look once painted. If the dent is deep, use a dent puller or glue-pull technique first to restore the metal shape. Only apply a thin skim coat of filler to smooth the surface before priming.
Ignoring rust prevention
Rust is the enemy of any auto body repair. If you see any orange spots or flaking paint during the repair process, you must treat the area with a rust converter or primer before applying filler or paint. Skipping this step means the rust will continue to spread underneath the new finish, causing the repair to fail within months. Always use a rust-inhibiting primer on any bare metal exposed during the sanding process.
No comments yet. Be the first to share your thoughts!