
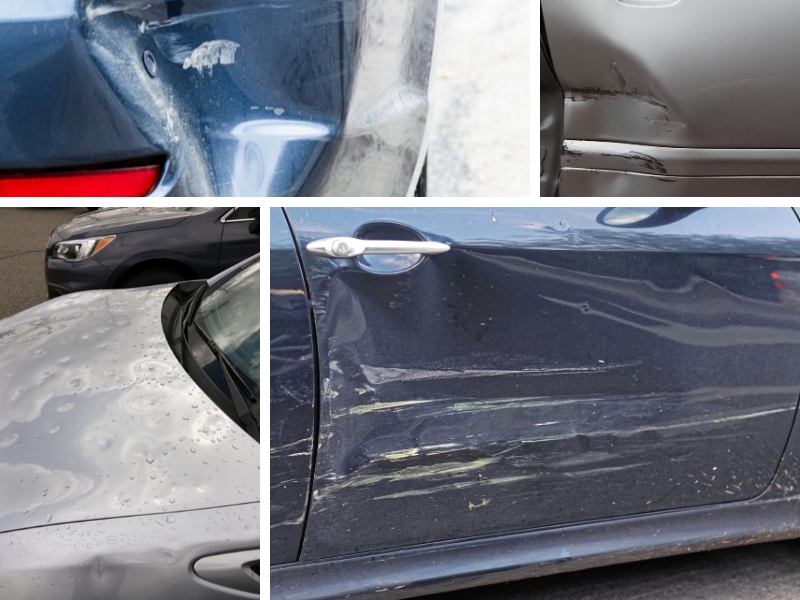
Assess the damage first
Before buying tools or attempting a repair, determine if the dent is actually suitable for a DIY approach. Not every imperfection on your car’s body can be fixed with a plunger or glue puller. The goal is to separate minor cosmetic blemishes from damage that requires professional machinery or paintwork.
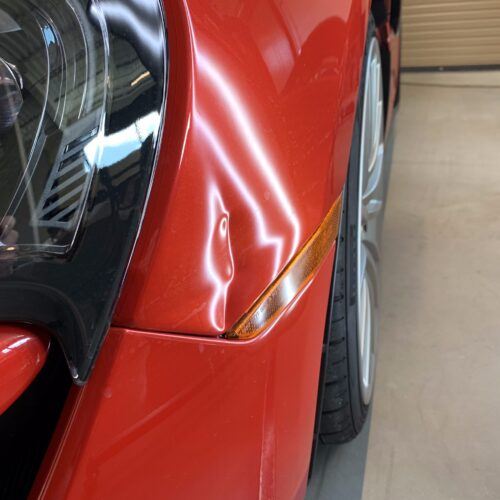
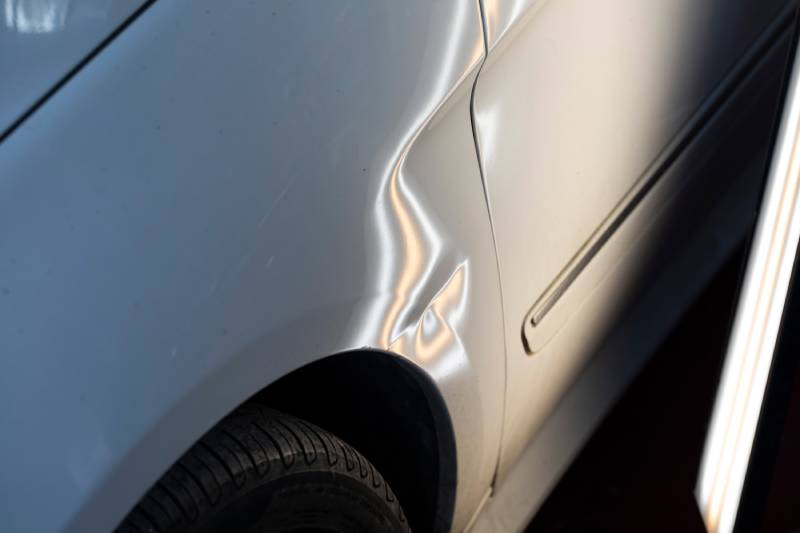
Start by inspecting the dent’s location and depth. Smooth, rounded dings on flat panels like doors or hoods are the easiest targets. These often respond well to paintless dent repair (PDR) techniques or simple suction methods. If the metal is still flexible and the paint is intact, you have a good chance of success.
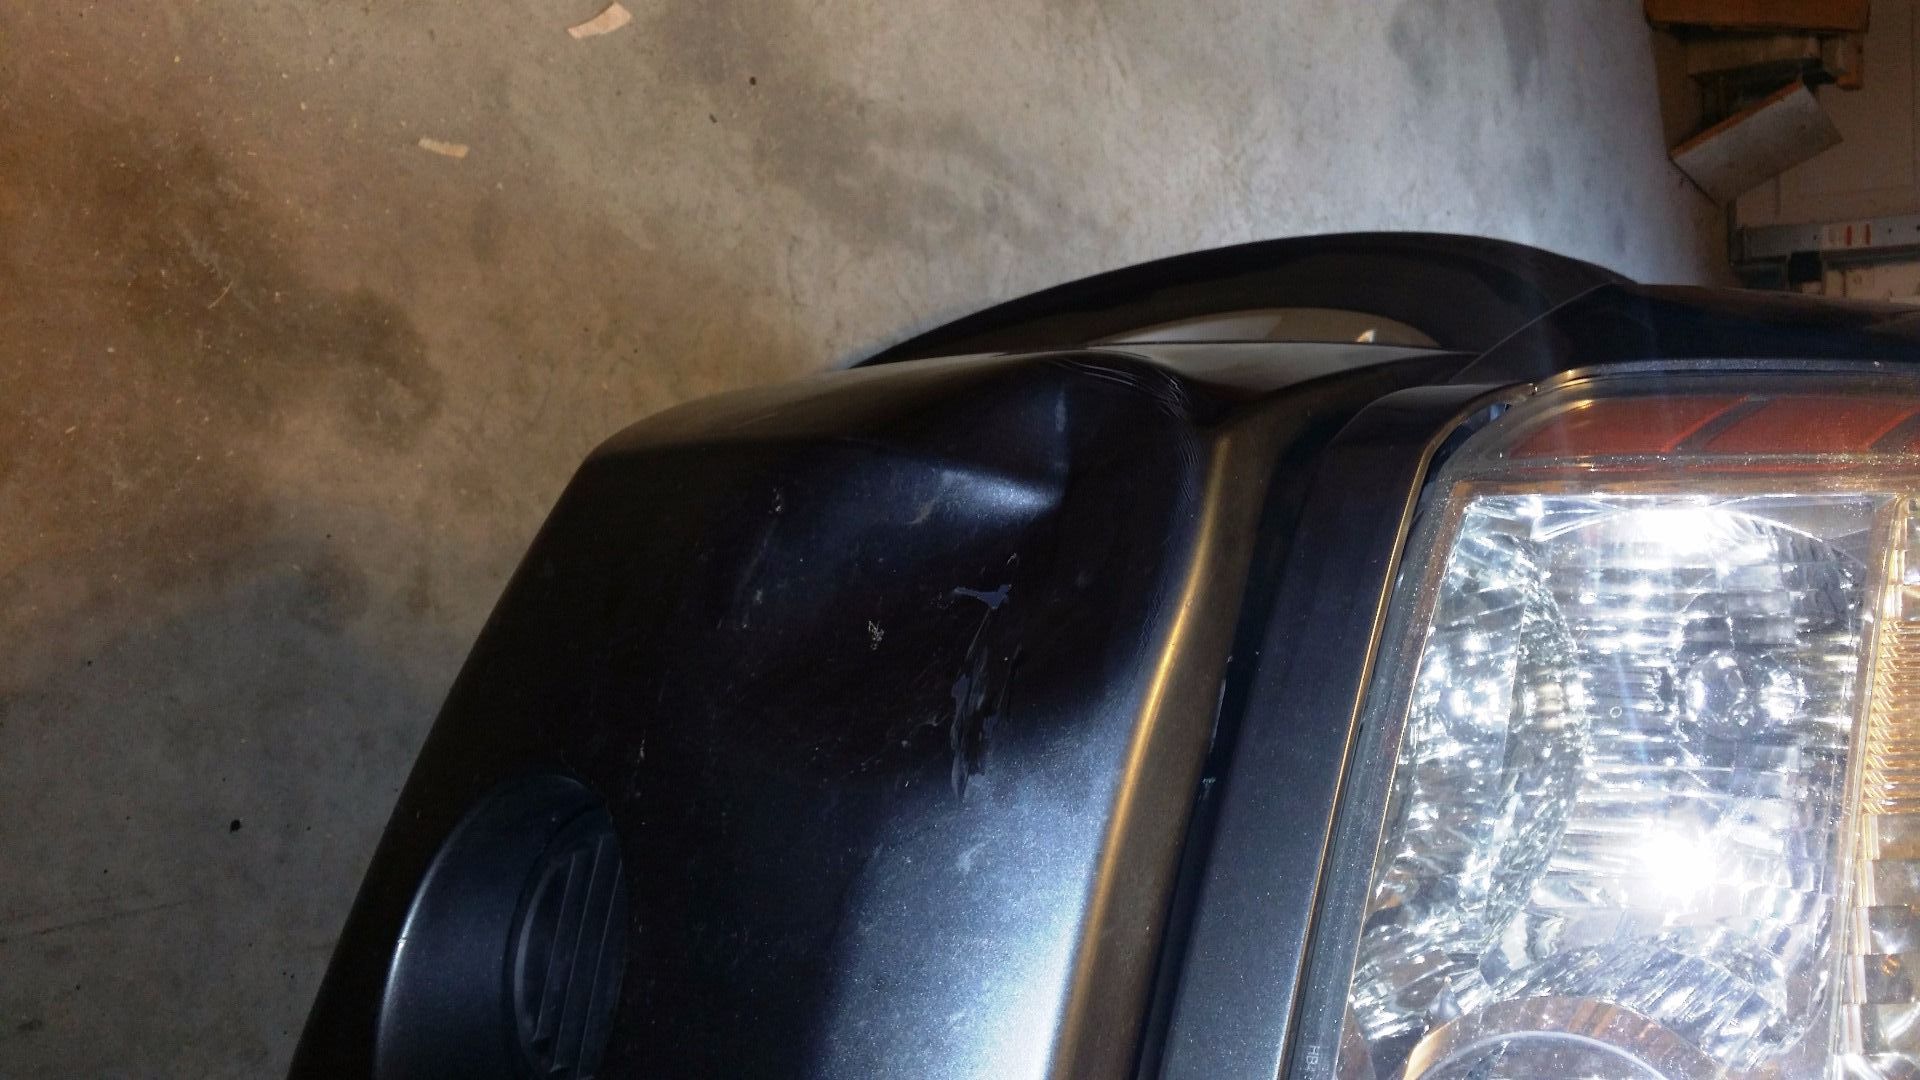
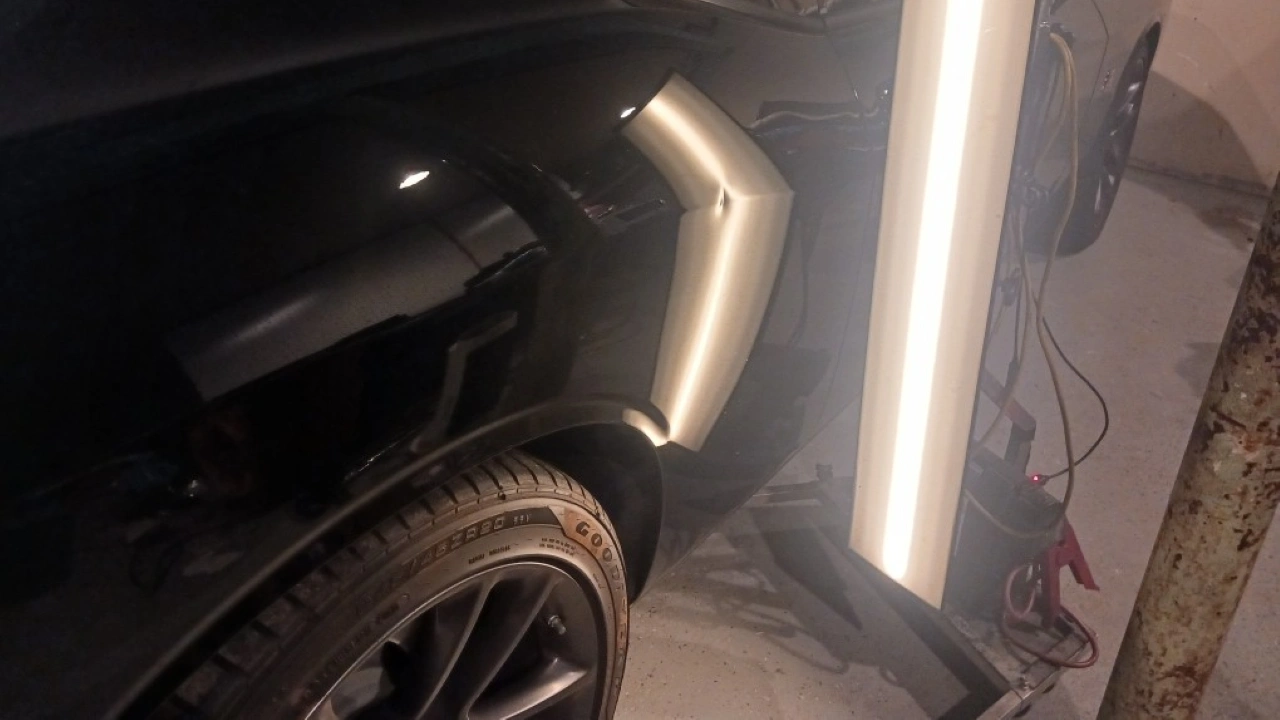
However, some damage is strictly off-limits for home repair. Avoid attempting fixes on sharp creases, edges, or areas where the paint has cracked. These conditions indicate the metal has stretched beyond its elastic limit. Trying to push out a sharp crease often results in further tearing or visible ripples that are impossible to hide.
Check the paint condition carefully. If the clear coat is chipped or the primer is exposed, moisture can quickly lead to rust. In these cases, DIY dent removal is only the first step; you will still need to sand, fill, and repaint the area. For significant structural damage or complex geometry, professional intervention is safer and more cost-effective than risking a botched repair.
Gather your repair tools
You can handle most minor dents with a small set of affordable items found at any hardware store. The right equipment makes the difference between a smooth repair and a permanent blemish. Start by clearing your workspace and laying out the basics below.
Essential tools for basic dent removal
- Rubber mallet and dollies: Use a rubber mallet to tap dents out from behind. Pair it with a steel dolly (a handheld metal block) to support the panel while you work. This combination gives you the control needed to push metal back into place without stretching it.
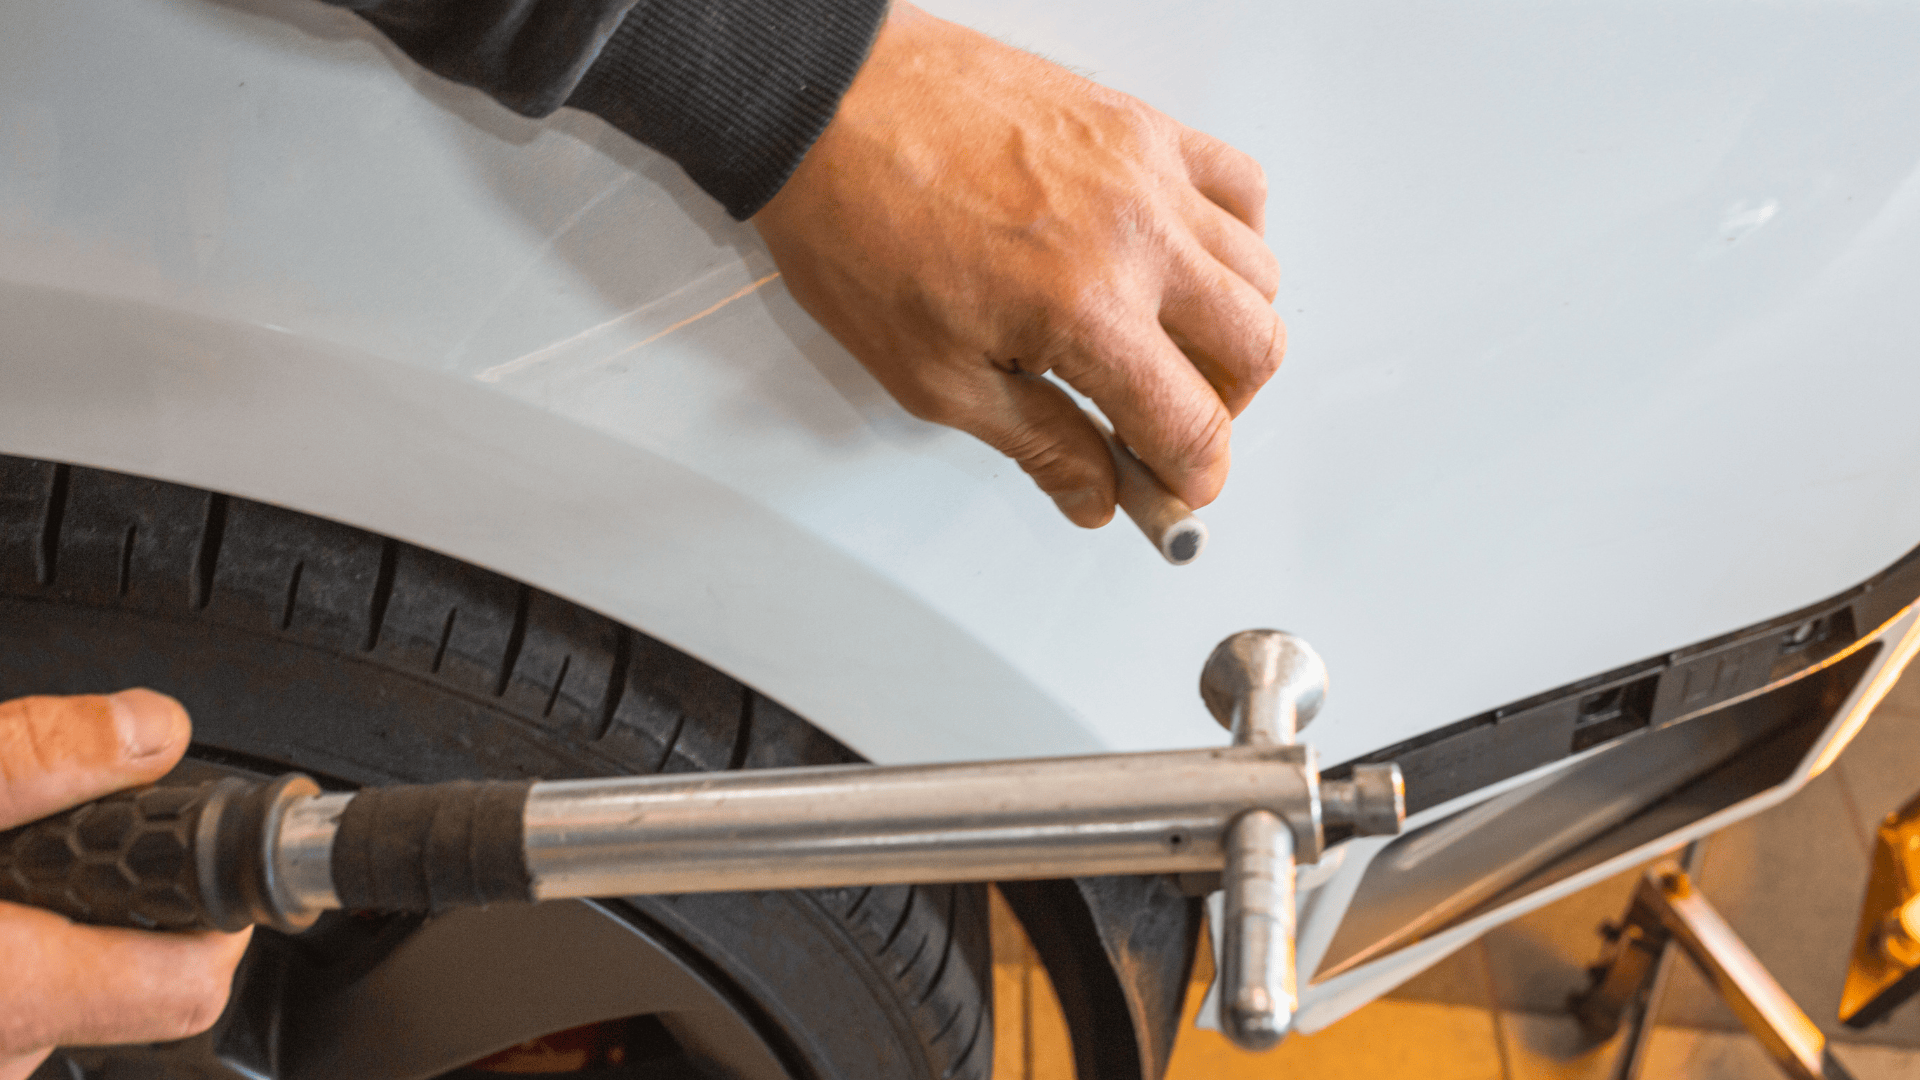
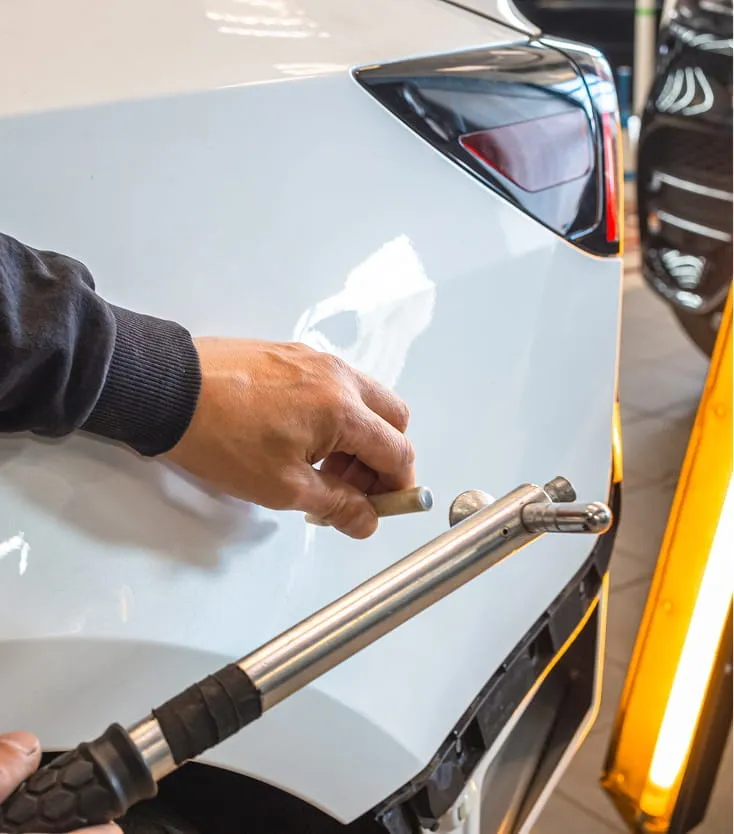
- Hot glue gun and pulling tabs: For surface dents where you can’t reach behind the panel, hot glue is a game-changer. Apply glue to plastic tabs and stick them to the dent. Pull the tabs with a slide hammer or your hands to lift the metal, then peel the tabs off with fishing line or a heat gun.
- Body filler and sandpaper: If the dent is too deep or the paint is cracked, you’ll need body filler (like Bondo) to fill the void. Keep 80-grit sandpaper for leveling the filler and 220-grit for smoothing it before priming.
- Cleaning supplies: Isopropyl alcohol and microfiber cloths are non-negotiable. You must remove all wax, grease, and dirt from the area before applying glue or filler. Any residue will cause your repair to fail.

Try the suction method
The suction method is the most accessible entry point for DIY dent repair, requiring almost no specialized tools. It works by creating a vacuum seal between a plunger and the dented panel, allowing you to pull the metal back toward its original shape. This technique is best suited for shallow, broad depressions on flat surfaces like doors or hoods, where the metal hasn't creased or cracked.
Gather your supplies
You only need a standard cup plunger—the kind used for sinks or toilets, not a flange plunger designed for toilets. Ensure the rubber cup is clean and free of debris to guarantee a tight seal. If the dent is in an area with poor visibility or awkward geometry, a helper can make the process smoother by holding the plunger steady while you pull.
Wash the dented area and the plunger cup with soapy water. Dry the surface completely. A clean, dry surface ensures the rubber creates an airtight seal, which is critical for generating suction. Any dirt or moisture can cause the seal to break mid-pull.
Run the plunger cup under warm water. This softens the rubber, making it more pliable and less likely to tear. It also helps the rubber conform to the contours of the dent, improving the seal. Do not apply water to the car paint itself; keep the vehicle dry except for the plunger.
Center the plunger cup directly over the deepest part of the dent. Press down firmly and evenly to push out the air. You should feel resistance as the vacuum forms. If the plunger slips, you didn't press hard enough or the seal is compromised. Re-wet and retry if necessary.
Pull straight out on the plunger handle with steady, moderate force. Avoid jerky motions that could damage the plunger or the paint. If the dent is shallow, it may pop back into place immediately. For slightly deeper dents, you may need to hold the suction for a few seconds before pulling.
Remove the plunger and inspect the repair. If the dent is still visible, reapply the plunger and try again, focusing on the edges of the depression. You may need to perform several pulls from slightly different angles to fully restore the panel. Avoid over-pulling, which can stretch the metal further.
If the suction method doesn't fully resolve the dent, it may be too deep or located on a panel with structural reinforcements that prevent movement. In such cases, glue pulling or professional paintless dent repair (PDR) may be necessary. For minor imperfections that remain, body filler can smooth out the surface before painting.
Use heat and cold expansion
When suction cups fail to pull out a dent, thermal shock can work. This technique relies on the principle that materials expand when heated and contract when cooled rapidly. By applying intense heat to the back of the dent and then freezing the surface, you create a pressure differential that pops the metal back into shape. This method works best on small, shallow dents in plastic bumpers or thin sheet metal.
Use a heat gun or a heat lamp to warm the dented area. If the dent is on a plastic bumper, this is often the most effective material for this method. Move the heat source continuously to avoid melting the paint or warping the plastic. Heat the area until it is hot to the touch but not smoking. Most bumpers take less than five minutes to heat sufficiently.

Immediately after heating, spray the dent with a can of compressed air held upside down. This releases a freezing propellant that drops the surface temperature drastically. Alternatively, use a dedicated cold spray or even a can of frozen air duster. The goal is to create a sharp temperature contrast between the heated metal/plastic and the frozen surface.
Listen and watch for the dent to pop back out. The rapid contraction can sometimes cause the dent to release within seconds. If the dent doesn't pop immediately, allow the area to return to room temperature, then repeat the heating and cooling cycle. Do not rush the process, as repeated thermal shock can crack paint if done too aggressively.
This method is particularly useful for plastic components where pulling tools might leave marks. However, be cautious with painted surfaces, as extreme temperature changes can cause paint to crack or peel. If the dent is large or deep, professional paintless dent repair is likely the safer and more effective route.
Apply body filler for deeper dents
When paintless dent removal isn't an option, body filler (often called Bondo) is the standard solution for filling low spots and imperfections. This process requires patience and precision to ensure the repair blends seamlessly with the surrounding panel. You are essentially rebuilding the surface layer, so accuracy during application is critical.
Remove paint and rust from the dented area using 80-grit sandpaper. The filler needs a clean, rough surface to bond properly. Sand a few inches beyond the edges of the dent to provide a smooth transition zone. Wipe the area with a wax and grease remover to ensure no oils interfere with the adhesive.
Squeeze a small amount of body filler onto a mixing board. Add a pea-sized amount of red hardener. Mix them together thoroughly with a plastic spreader until the color is uniform. Work quickly, as the chemical reaction begins immediately and the filler will harden within minutes.

Press the mixed filler into the dent using the spreader. Apply it slightly proud of the surrounding panel to account for shrinkage. If the dent is deep, apply multiple thin layers rather than one thick layer to prevent cracking and excessive shrinkage. Smooth the edges to feather them into the sanded area.

Once the filler has hardened, sand it down with 180-grit sandpaper. Use a block to keep the surface flat and even. Check for low spots by running your hand over the area; it should feel perfectly smooth with no dips or ridges. Switch to 320-grit sandpaper to refine the surface before priming.
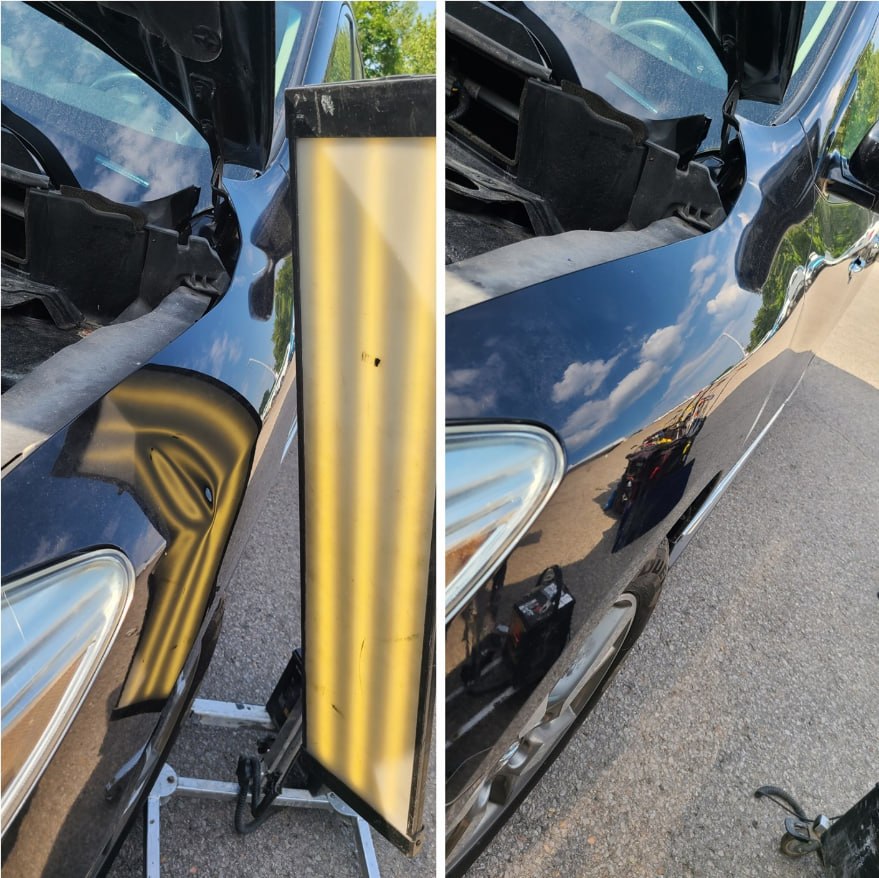
This method transforms a deep depression into a flat surface ready for primer and paint. Always wear a respirator when sanding, as filler dust is hazardous to inhale. For a visual demonstration of the mixing and application technique, refer to the video below.
Finish and blend the surface
For most Car Dents at Home glitches, start with the least invasive restart and then retest the exact feature that failed. If the display froze, confirm touch response, climate controls, navigation, audio, and phone pairing after the reboot. If the issue was connectivity, test Wi-Fi, cellular signal, Bluetooth, and the companion app separately so one weak connection does not look like a full system failure. If the problem returns immediately, look for a pattern instead of repeating the same reset. Recent updates, low signal, a newly paired phone, a USB accessory, or a profile sync issue can all make the failure look random. Remove one variable at a time, then give the system a few minutes to reload before judging the result. Escalate when the screen stays black, the same warning returns, basic controls are unavailable, or the reboot only works for a few minutes. At that point the most useful thing you can provide is a short log: time, software version, exact symptom, what reset you tried, and whether the car or device was parked and awake.
-
Park and note the symptomPut the system in a safe idle state, then write down whether Car Dents at Home is frozen, blank, slow, disconnected, or only failing in one app.
-
Try the normal restart firstUse the standard screen or interface restart before changing settings, deleting profiles, or disconnecting accessories.
-
Retest one feature at a timeCheck touch response, audio, navigation, phone pairing, Wi-Fi, and app access separately so the failing path is clear.
-
Escalate repeated failuresContact official support when the screen stays black, warnings appear, or the same issue returns after a clean restart.
Check your work carefully
A repair is only as good as the finish you can see and feel. After sanding and painting, your primary goal is to eliminate any trace of the dent or the repair process itself. Inspect the panel under bright, direct light to catch subtle imperfections that casual glances might miss. Look for "orange peel"—a bumpy texture where the paint didn't flow smoothly—or uneven height where the repaired spot sits higher or lower than the surrounding metal.
Run your hand over the area to detect ridges or dips that aren't immediately visible. If you feel a transition, the filler or primer was likely sanded unevenly or the paint layer is too thick. Use a guide coat (a light dusting of contrasting spray paint) to reveal high and low spots during the final sanding phase. This visual aid ensures you sand only what needs it, preventing you from sanding through the clear coat.
If you find minor imperfections, wet-sand the area with fine-grit paper (1500–2000 grit) followed by polishing compound to restore gloss. For larger errors, you may need to feather-edge the repair and apply a thin additional layer of filler or primer. Remember, it is better to take extra time here than to drive off with a visible patch.
-
Smooth touch: No ridges or dips when running a hand over the panel
-
Visual match: No orange peel or texture mismatch under direct light
-
No dust nibs: Surface is free of tiny embedded particles or debris
-
Color blend: Paint fades naturally into the surrounding area without a hard line
Common questions about dent repair
Before you start, it helps to know the limits of DIY work. Minor dents, bumper scrapes, and door dings often respond well to home remedies. However, sharp creases or damage on body lines usually require a professional.
Can a dented car be repaired?
Yes, most minor dents can be fixed. For significant damage, paintless dent repair specialists or auto body shops are better suited to create a flawless finish. DIY methods like body filler work for small imperfections but won’t match professional quality on large panels.
How much does professional dent repair cost?
Repairing a dent at an auto shop typically costs between $300 and $1,500. The price depends on the extent of the damage and the labor involved. While DIY saves money upfront, professional results often justify the cost for resale value or aesthetic reasons.
When should I seek professional help?
Seek help if the dent is on a sharp body line, near the edge of a panel, or if the paint is cracked. DIY tools cannot restore the metal’s original shape in these complex areas. Attempting to fix these yourself may worsen the damage and increase final repair costs.
No comments yet. Be the first to share your thoughts!